Property Detail Page
The Property Detail Page is designed to assist Org Admin and Property Manager in efficiently navigating and managing property-related information within the admin dashboard. This document covers all important functions involved in property management, ensuring accuracy and consistency in handling data.
Whether you are adding a new property listing, updating details of rental units, assigning or reassigning a property manager, earning of the property or reviewing maintenance and service requests.
Step-By-Step Guide For Property Detail Page
Log In To Your Account
- Begin by logging in to the admin dashboard using your credentials.
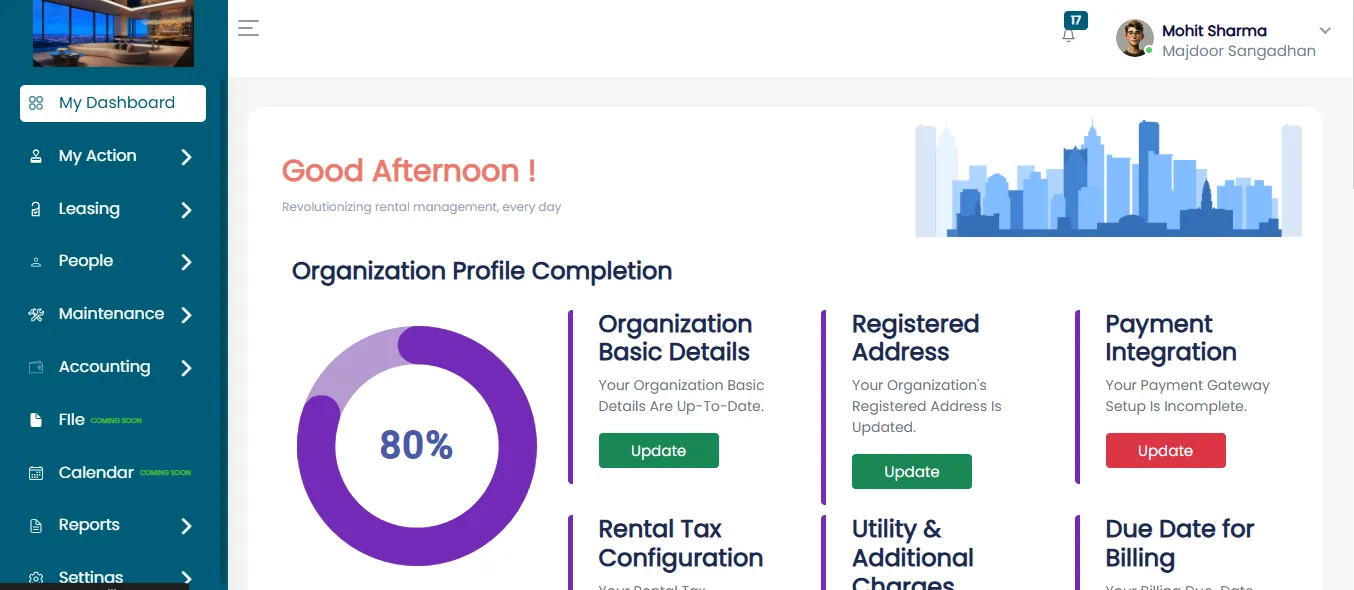
Access The Leasing Section
- Once logged in, go to the main menu and click on the Leasing tab. Now click on the Properties tab.
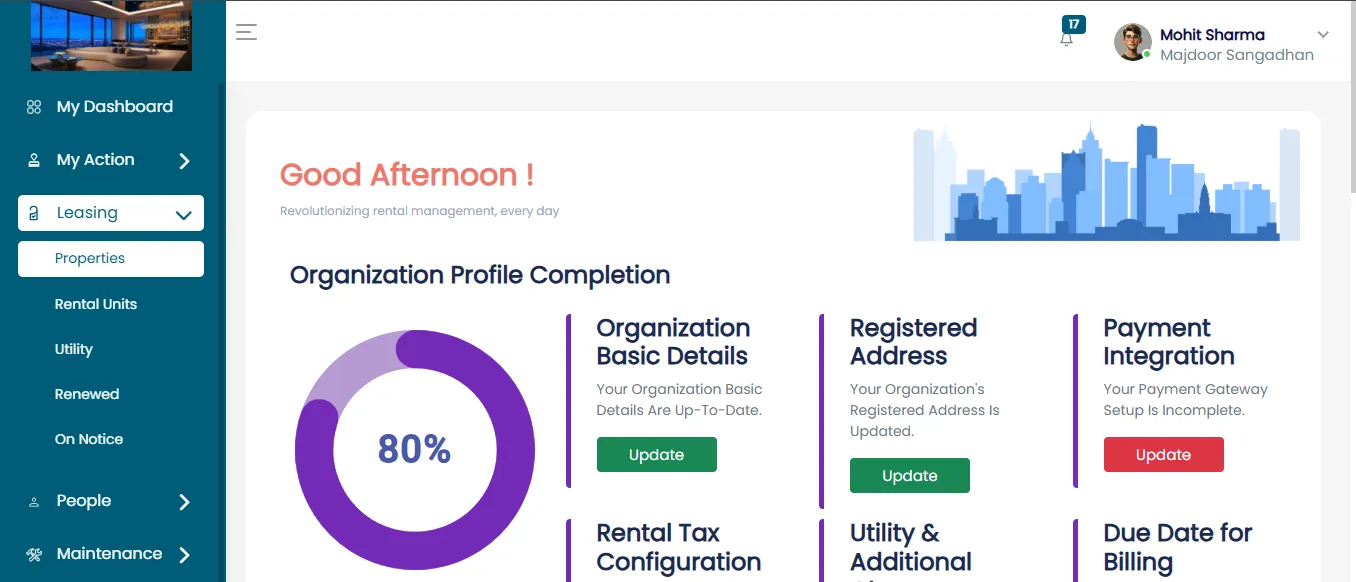
Open The Properties Tab
- After clicking on the Properties tab. This will open the Property Dashboard page.
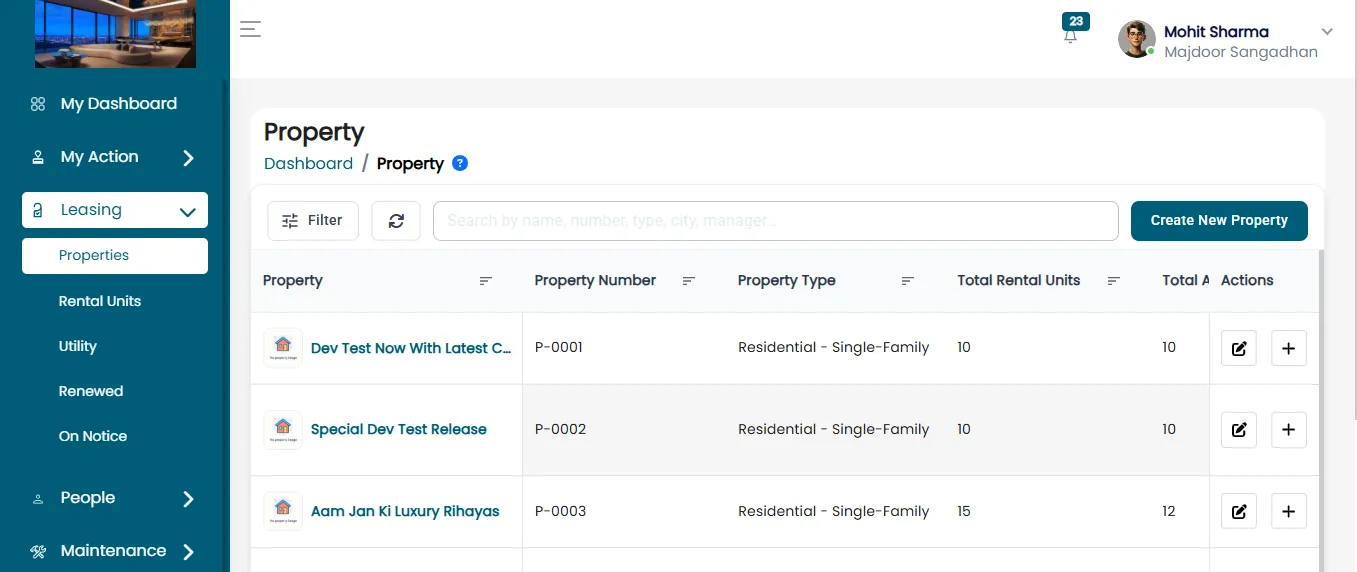
View Property Details
To view the property details, select the property's name (for example, Andheri Tower) by clicking on it. This will open the Property Detail Page, which provides information including:
- Total Rental Units
- Leased Units
- Vacant Units
- Earning starts
- Owner
- Rental Units
- Amenities
- Property Manager
- Earning
- Maintenance
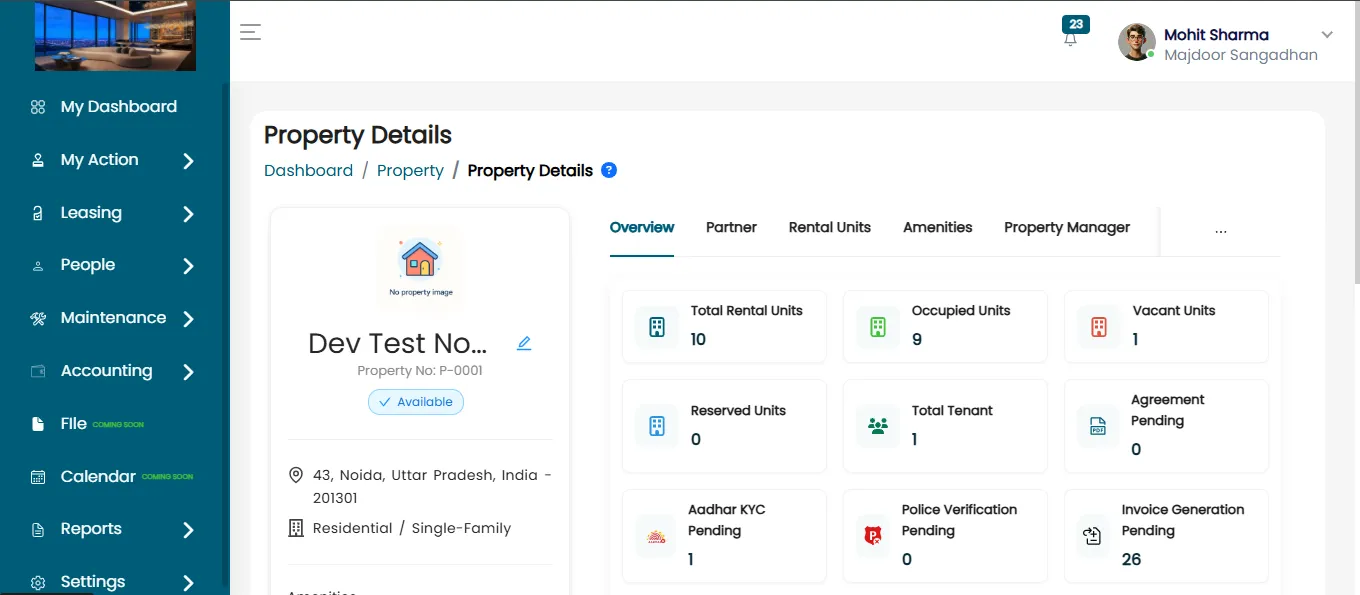
Property Detail Page Breakdown
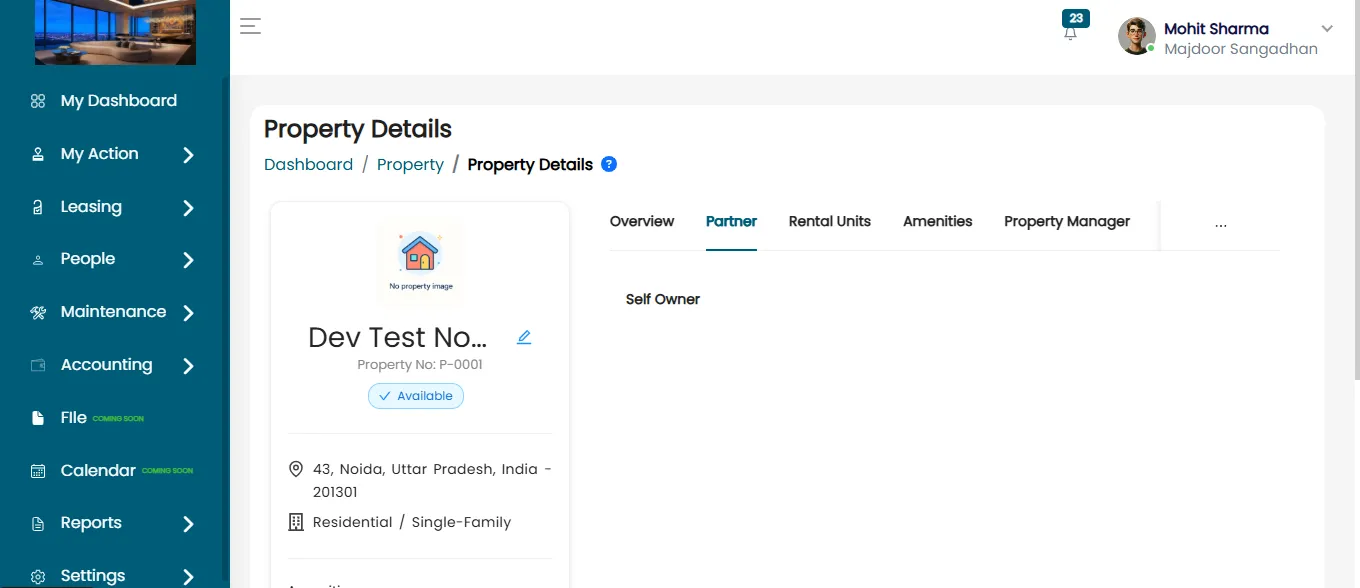
Partner
This section displays whether the owner is a Self-Owner or if a Property Manager has been assigned.
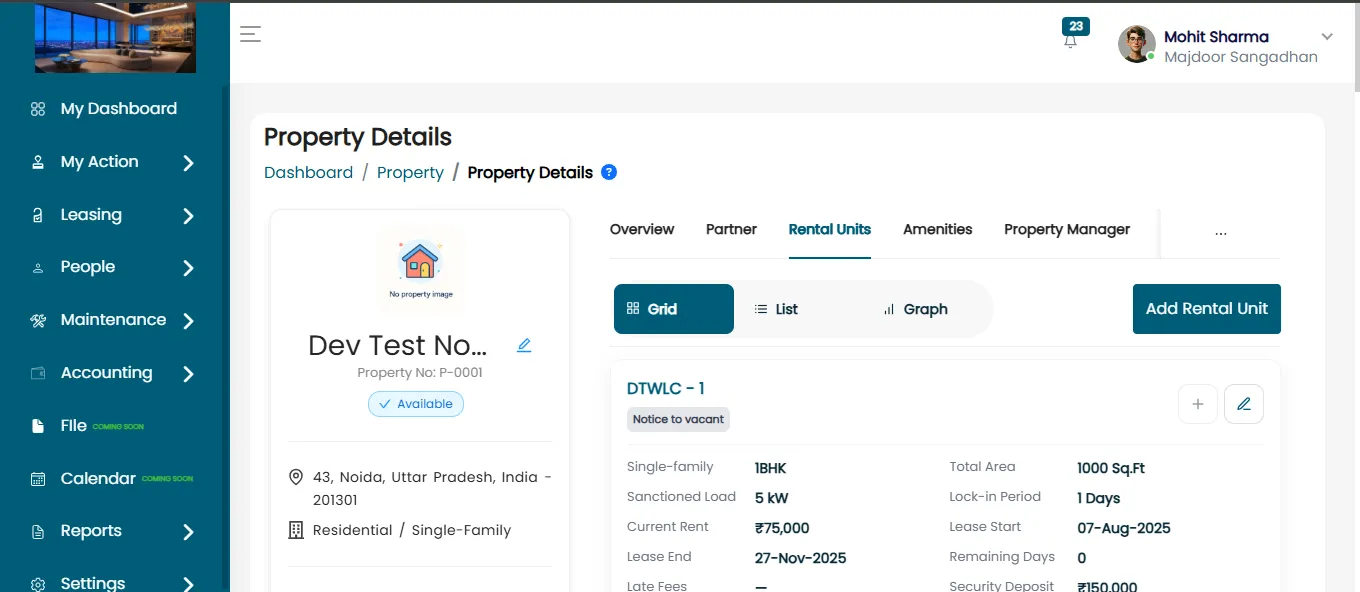
Rental Units
This section provides detailed information on rental units, including:
- Rental Units
- Leased
- Vacant Rental Unit
You can also view the leased and unleased units and have the option edit and add new rental units from this section.
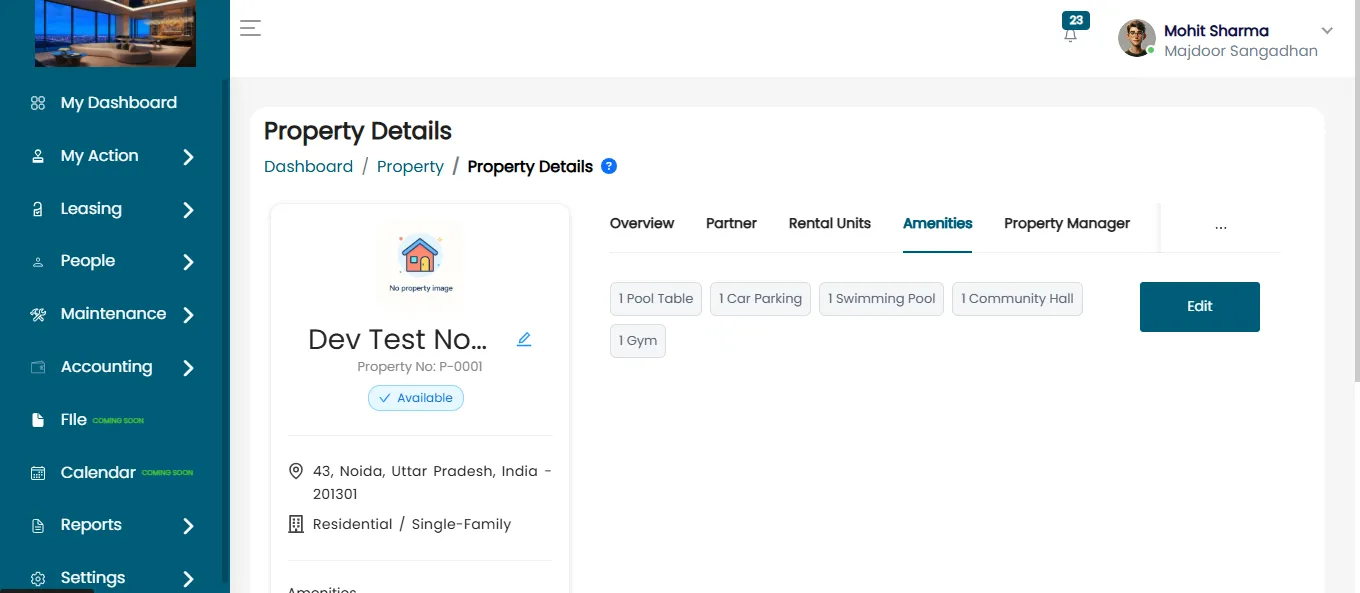
Amenities
This section lists the amenities available at the property, such as:
- Pool Table
- Car Parking
- Gym
- And other available facilities
Property Manager
This section shows whether a Property Manager is currently assigned. If assigned, you can:
- View full details of the Property Manager
- Reassign or Unassign the Property Manager
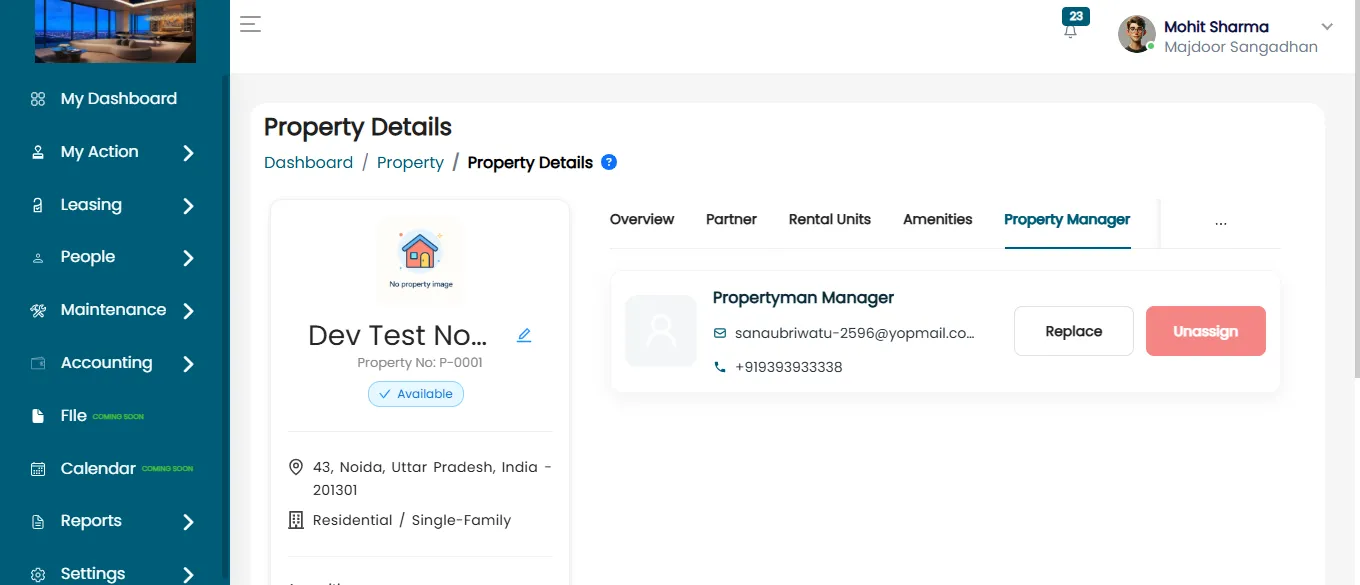
- From here, you can create a new Property Manager or you can re-assign the Property Manager.
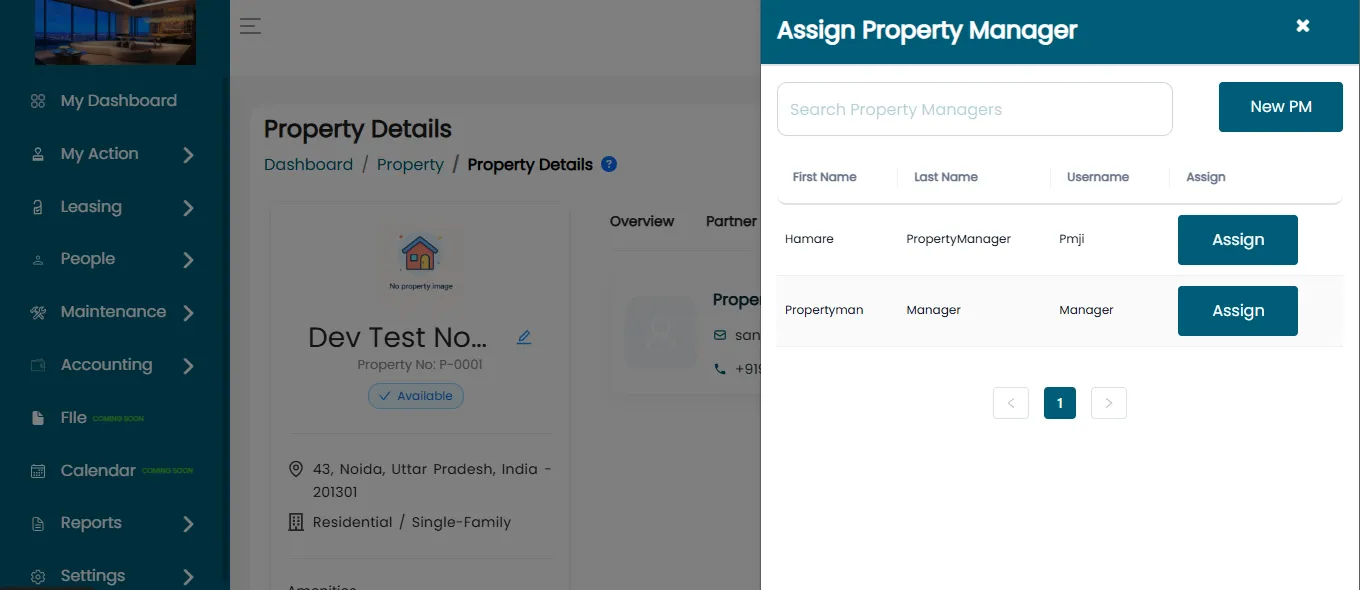
- Once all necessary details are entered, click Assign to successfully assign the Property Manager.
Earnings
This section displays the property's earnings information. Such as Expected Earnings and Generated Amount.
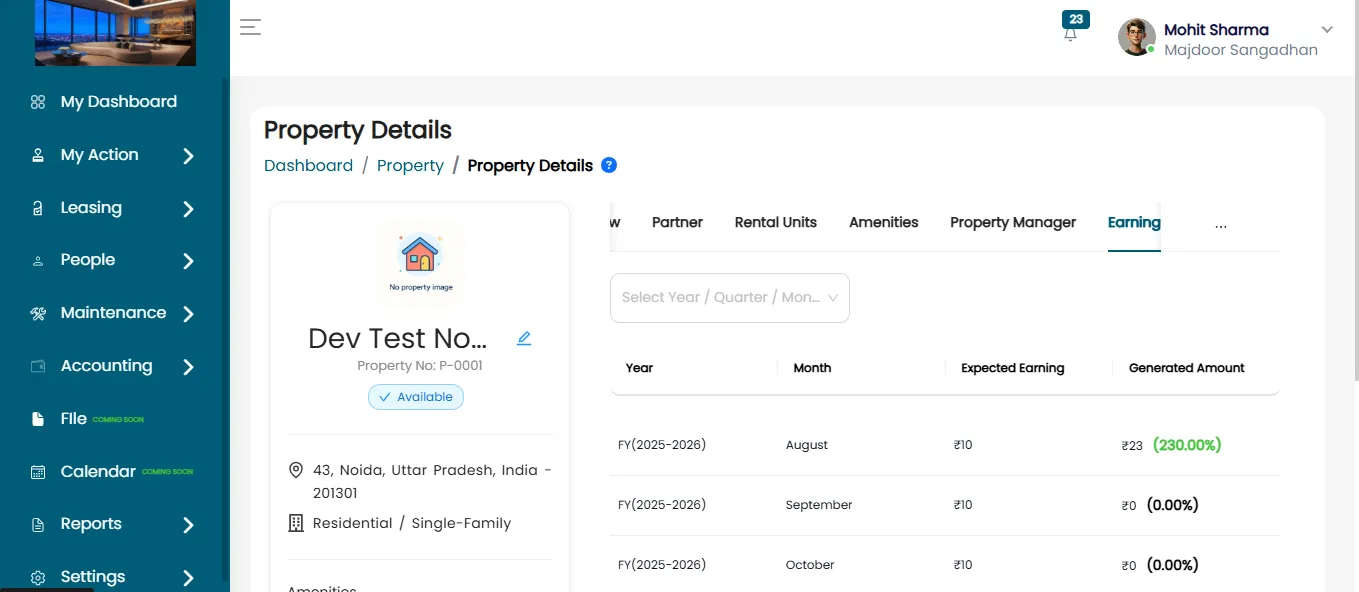
Expected Earning
This refers to the anticipated rental income a property owner expects to receive if the property is fully rented out for the entire period with 100% occupancy (typically monthly or annually).
Generated Amount
This is the amount of income the property actually generated over a specific period. This amount may be lower than the expected earnings due to factors such as:
- Vacancy (months when the unit was empty)
- Delayed or missed rent payments
- Discounts offered to tenants
- Maintenance (when the flat was unavailable for rent)
Example
Suppose a unit was vacant for 2 months, and during 1 month the Property Manager had to offer a discount of ₹1,000, so the rent that month was ₹19,000 instead of ₹20,000.
- Rent received for 9 full months: ₹20,000 × 9 = ₹1,80,000
- Discounted rent for 1 month: ₹1,000
- No rent for 2 months: ₹0
- Total Generated Amount = ₹1,80,000 + ₹19,000 = ₹1,99,000
So, the Generated Amount = ₹1,99,000 The Expected Earning from the property was ₹2,40,000, However, the Generated Amount, or the actual income received during that period, turned out to be ₹1,99,000. As a result, there is a loss of ₹41,000.
Maintenance
The maintenance section provides a summary of service requests, including:
- Total Requests: e.g., 9
- Pending Requests: e.g., 5
- Completed Requests: e.g., 2
- Rejected Requests: e.g., 2
If Admin Click on view all button then he/she will be directed to service request page.
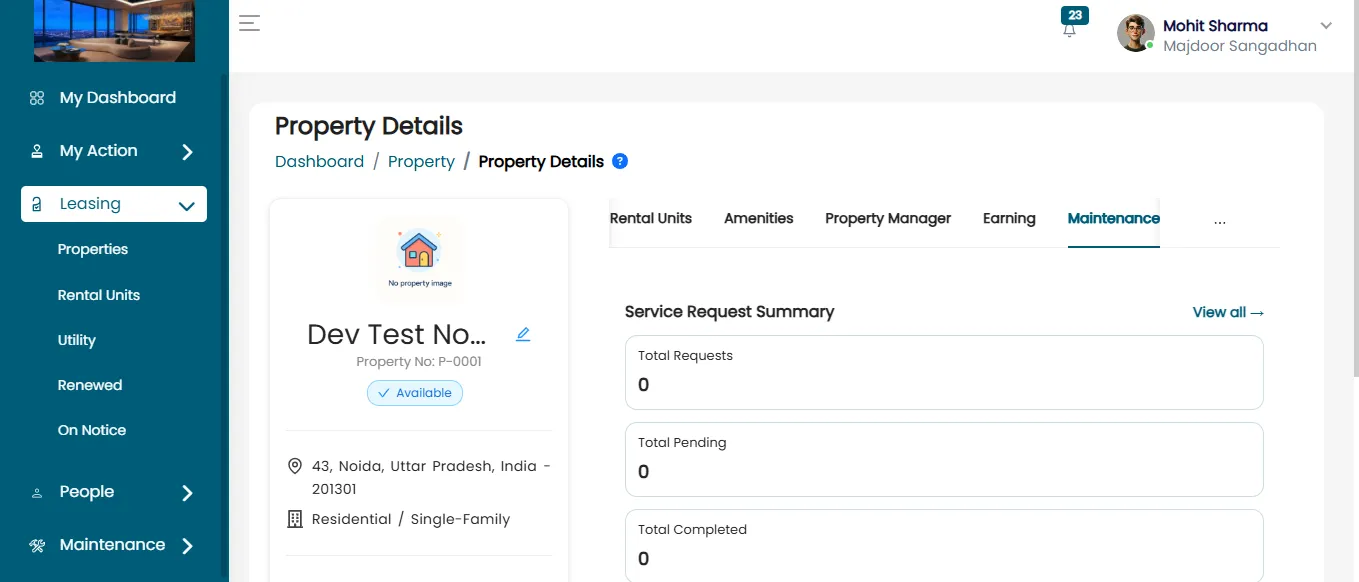
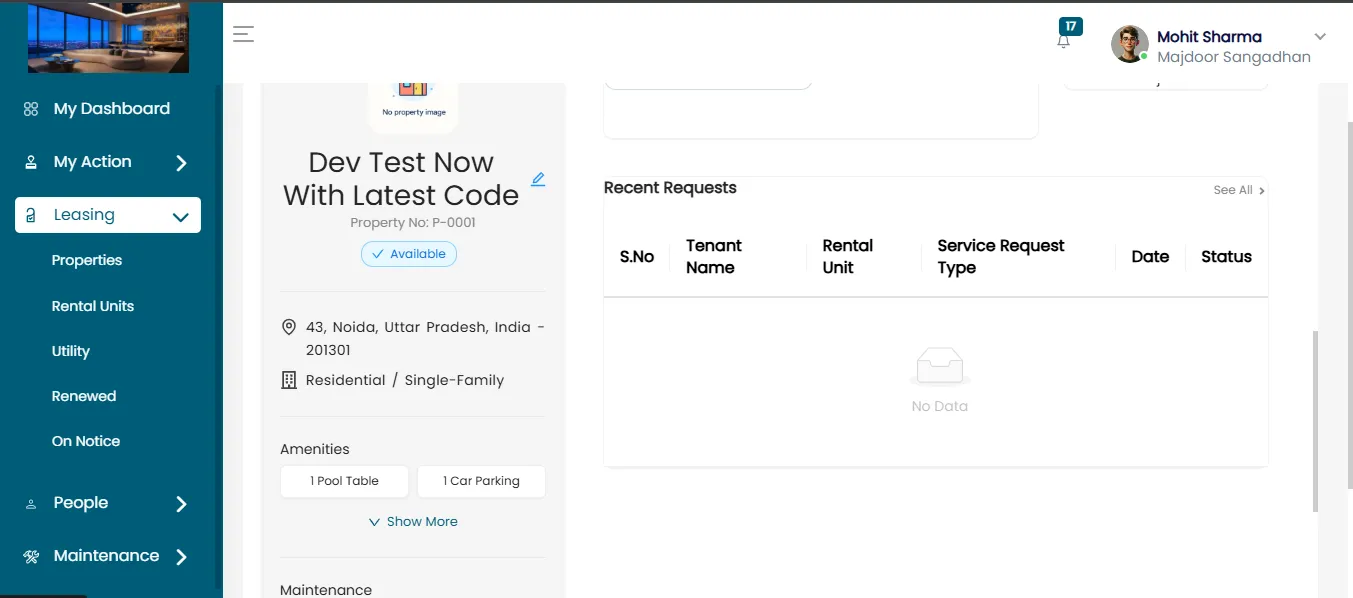
By scrolling down, you can view recent service requests with the following details:
- Tenant Name
- Rental Unit
- Service Request Type
- Date
- Status: (Completed / Rejected / Pending)
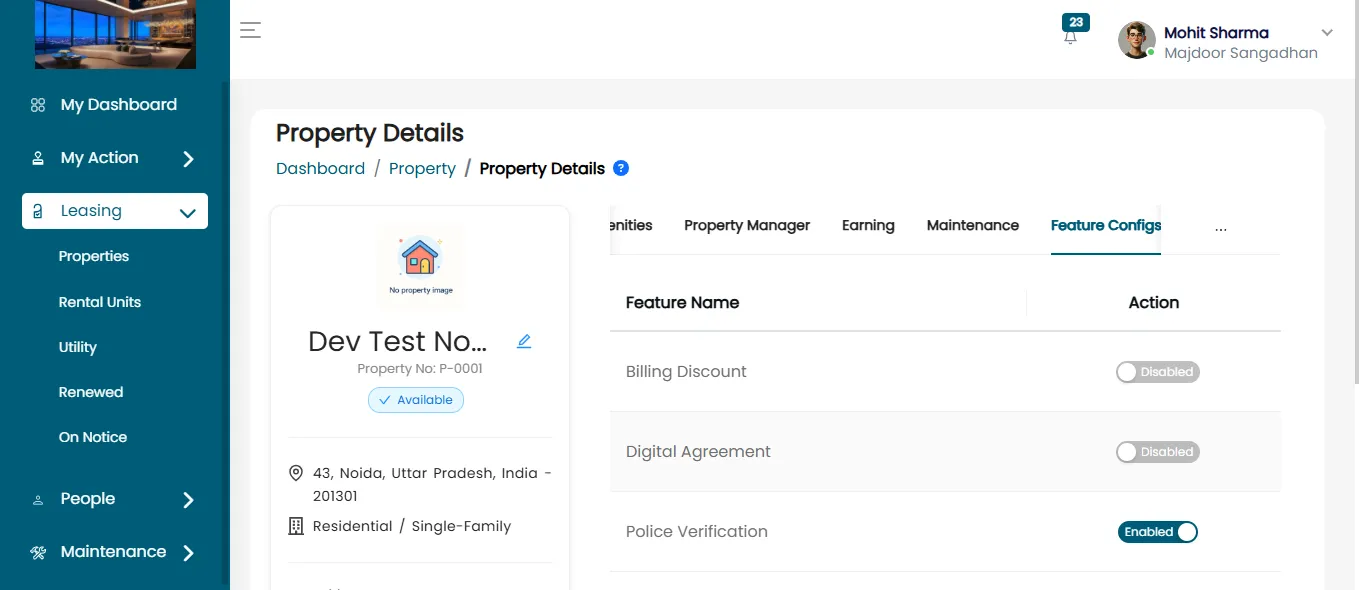
Feature Configs
The Feature Configs section displays all available features, including Digital Agreement, Police Verification, Notice Period Policy, Synchronised, Billing Discount, Aadhaar Verification, and Date-to-Date.
From this section, the admin can enable or disable any feature as needed. When a feature is disabled, tenants will not be able to view or use it in the ERP. When a feature is enabled, all tenants associated with that property will be able to view and access it.