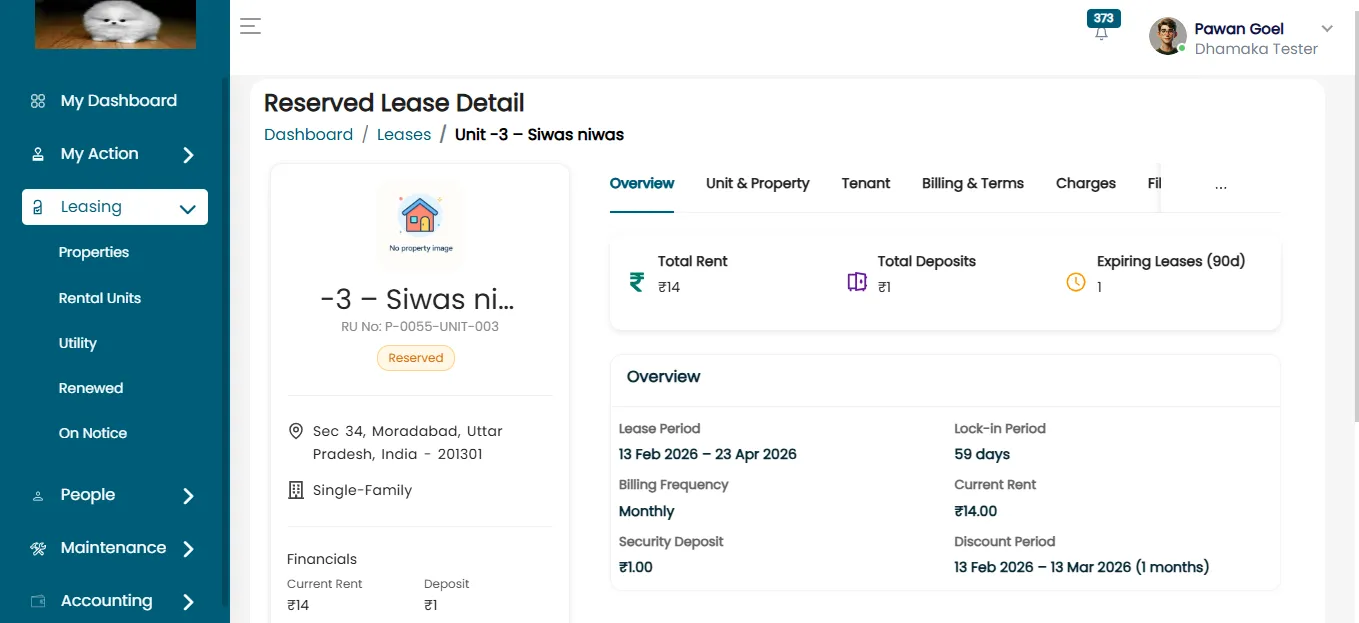
Add Lease With New Tenant
Log In To Your Account
Once logged in, you will be directed to your Dashboard, from where you can begin the lease creation process.
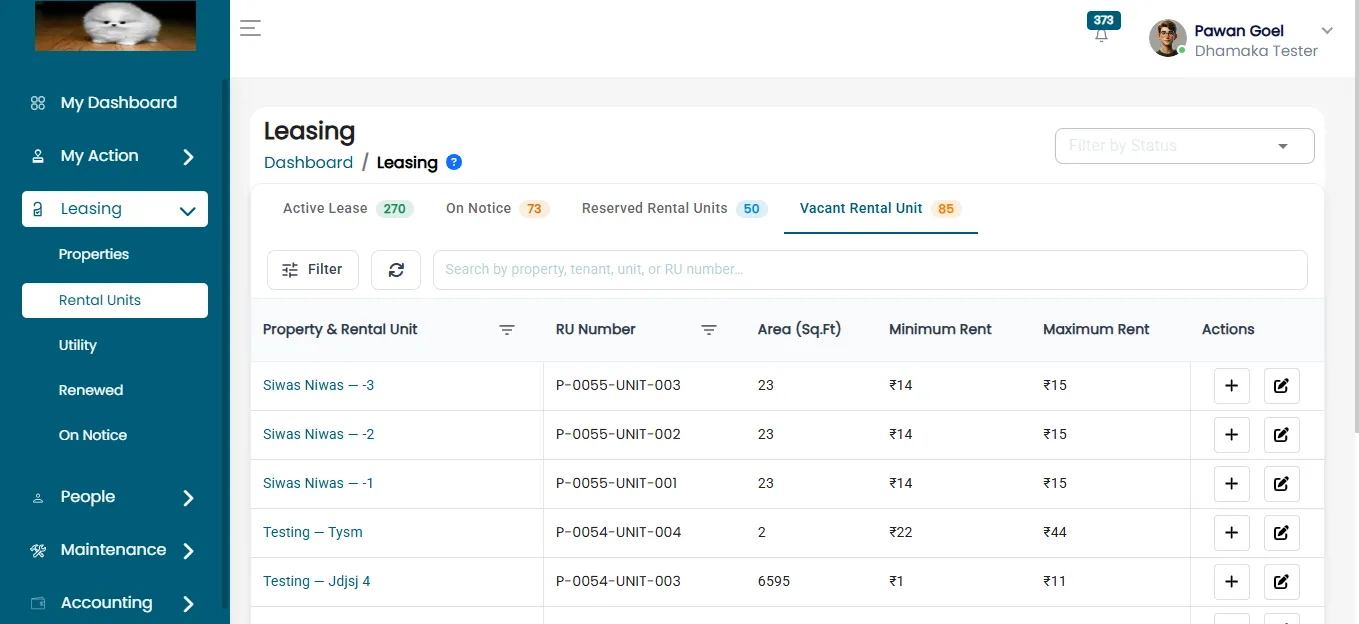
Access Rental Units
- From the Leasing section, click on Rental Units.
- The detail page displays four main categories:
- Active Lease
- On Notice
- Reserved Rental Units
- Vacant Rental Units
- Click on the Vacant Rental Unit tab to see all units available for leasing.
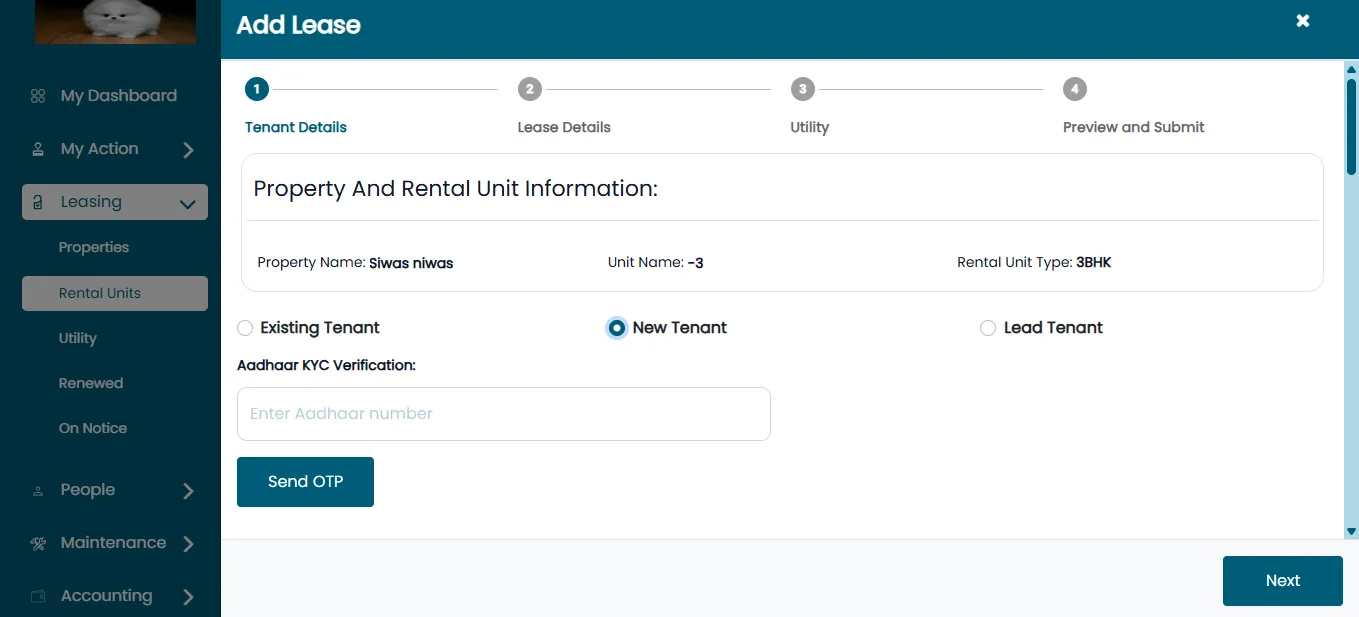
Add a New Lease
- Click on the Add Lease.
- After that, you’ll be taken to the Tenant Details section.
- After that, you will see the Existing Tenant and New Tenant options.
- Then, Click on the New Tenant Option. After Clicking on the New Tenant Option Tenant Detail Page Will Open.
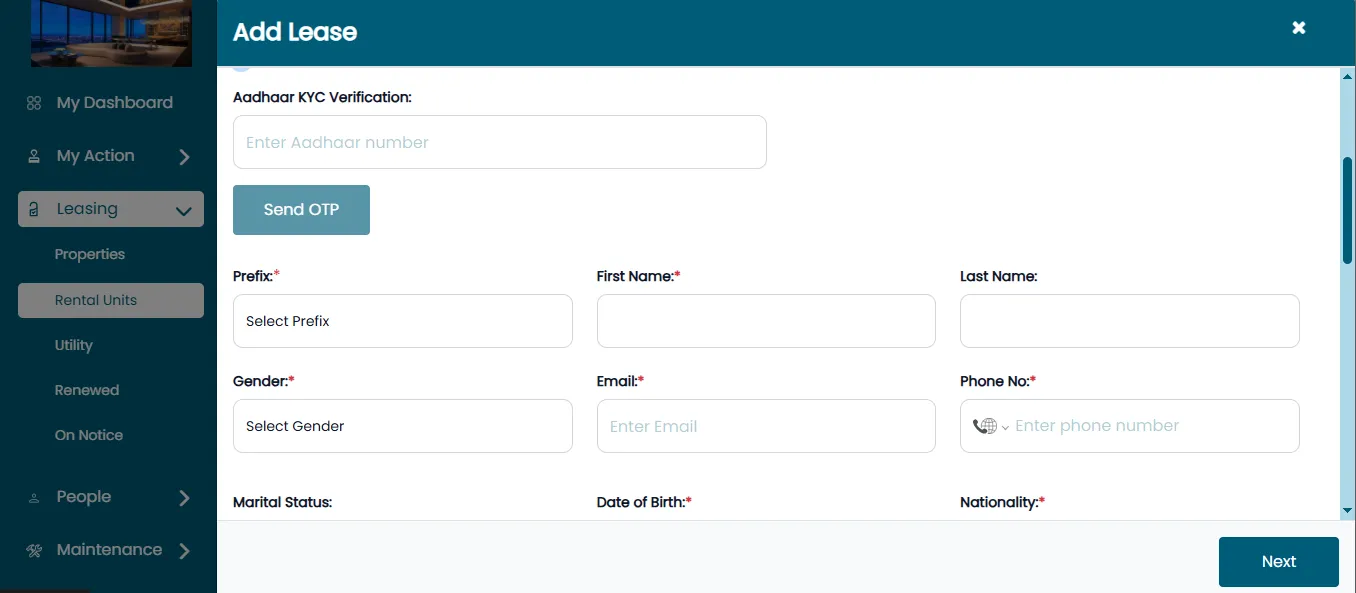
Enter Tenant Details
Fill in the new tenant's personal information:
- Prefix (Mr./Ms./Mrs.)
- First Name & Last Name
- Gender
- Email Address
- Phone Number
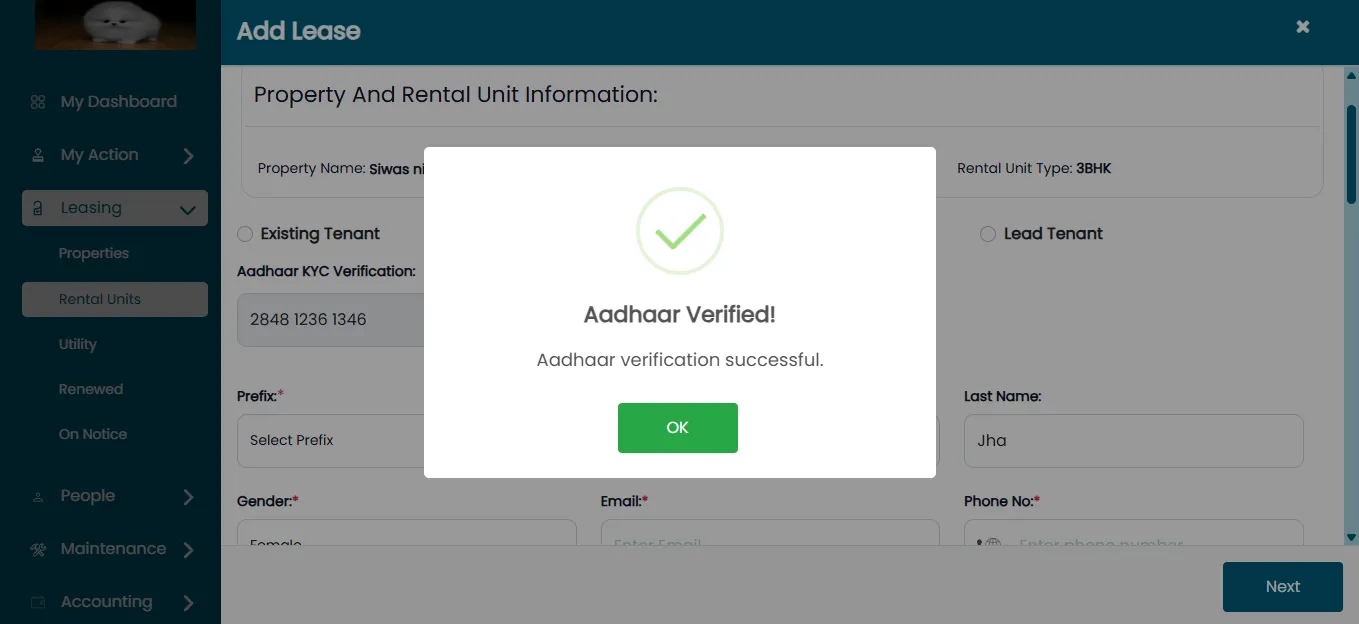
Aadhaar Verification
- Enter the tenant’s Aadhaar Number.
- You will get the OTP on registered mobile number.
- Enter the OTP, If it is correct then the Aadhaar will be verified.
Once verified, proceed by clicking Next.
Enter Lease Details
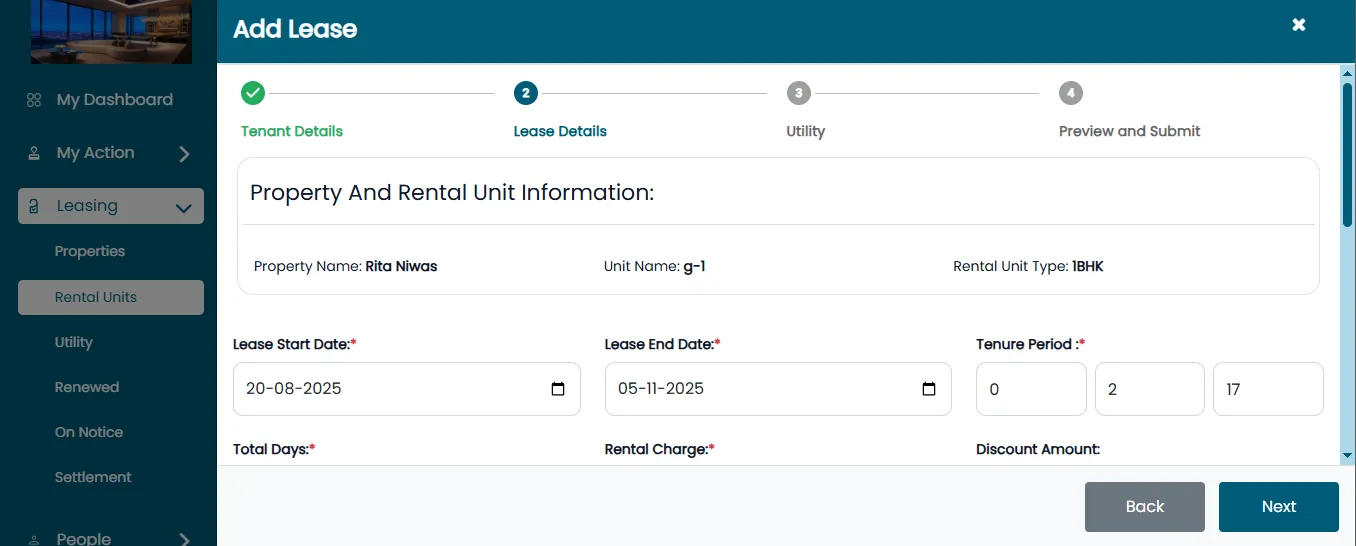
After clicking on Next, the Add Lease page will open.
Fill out all the fields in this section. The fields include:
- Lease Start Date and Lease End Date: Mention the duration.
- Tenure Period (Months): shows the total number of months for the lease.
- Monthly Rental Charge: Monthly rent amount.
- Discount Amount: If applicable, fill in the discount amount provided.
- Discount Period (Months): Mention the discount period.
- Security Deposit Amount: Mention the deposit amount.
- Late Fine (Per Day): Mention the penalty for late payments.
- Lock-In Period (Months): Minimum duration the tenant must stay.
After that, Upload the Lease Agreement.
Add Energy And Other Charges
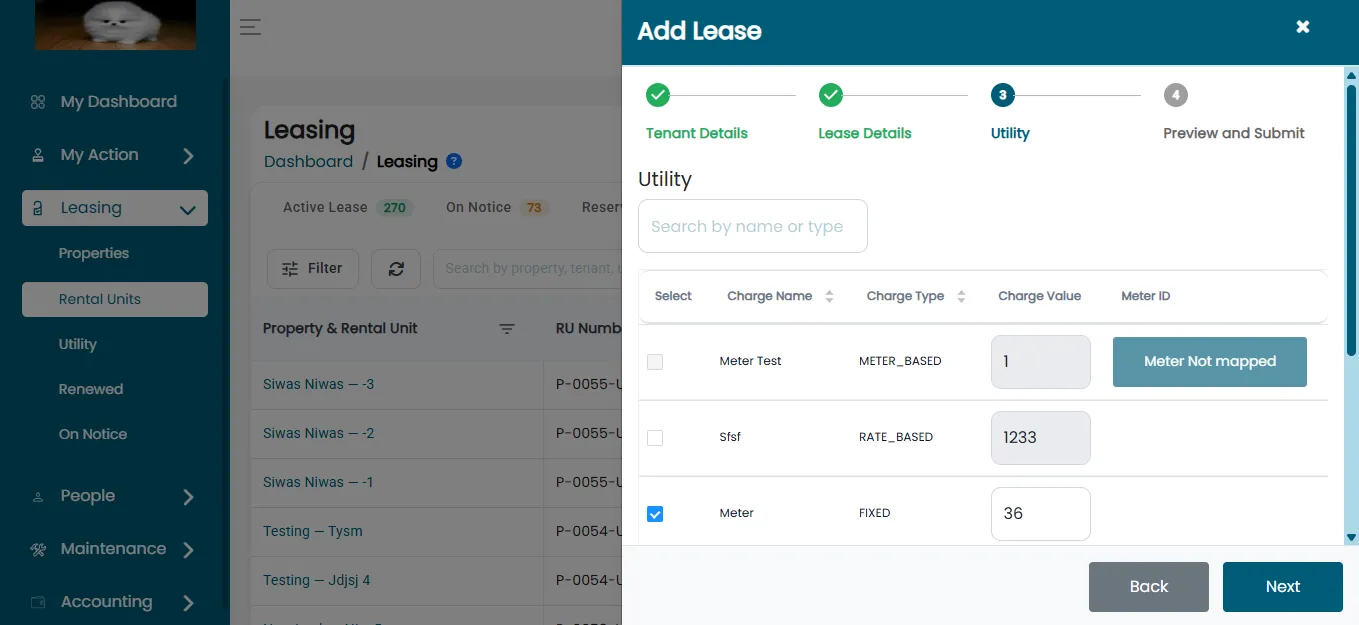
After clicking on Next Add Energy & Other Charges page will open, where you have to fill
- Charge Name: Name of the utility or service, e.g., power backup
- Charge Type: Fixed or Rate-Based.
- Default Value: Rate per unit of usage.
Review And Submit
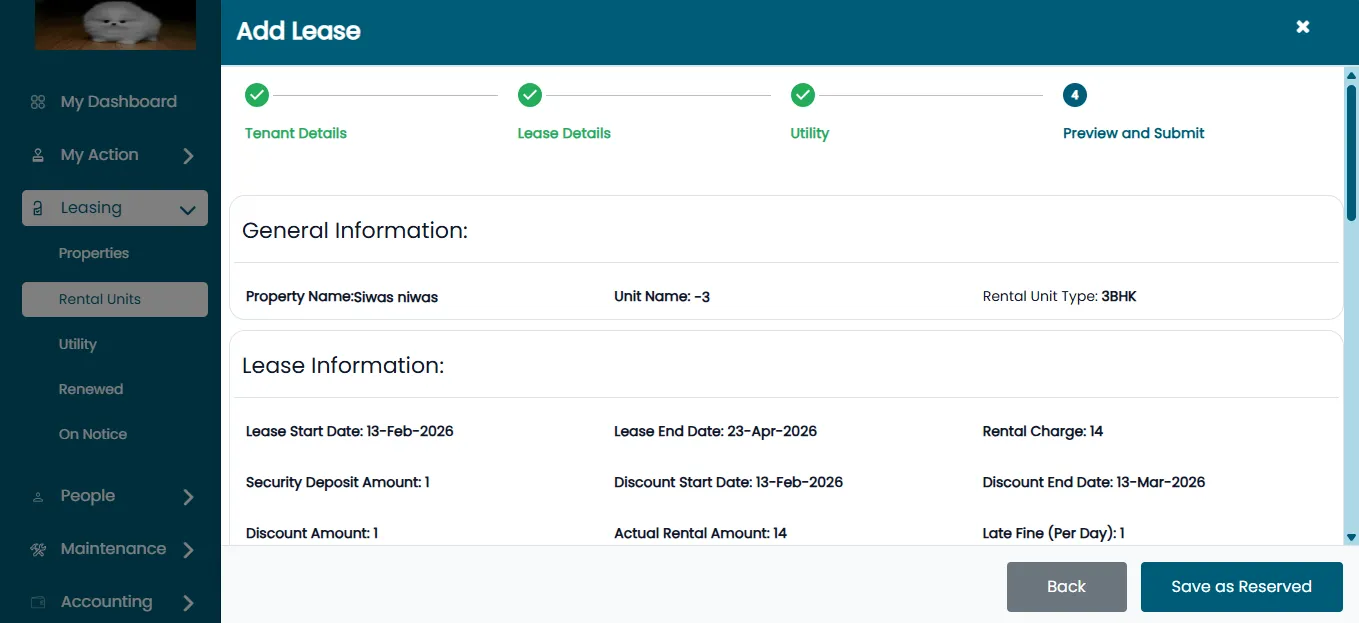
After clicking on Next Preview and Submit page will open.
On the Preview & Submit page, review all the entered information:
- General Information: Property Name, Unit Name, Rental Unit Type
- Tenant Information: Prefix, First Name, Last Name, Gender, Email, Phone Number.
- Lease Information: Duration, rent, discounts, and penalties.
- Lease Agreement: Review the Lease agreement
- Energy and Other Charges: Review the energy charges.
Lease Created Successfully
After verifying everything, click the Submit button.The lease has now been created and lease saved as reserved successfully.
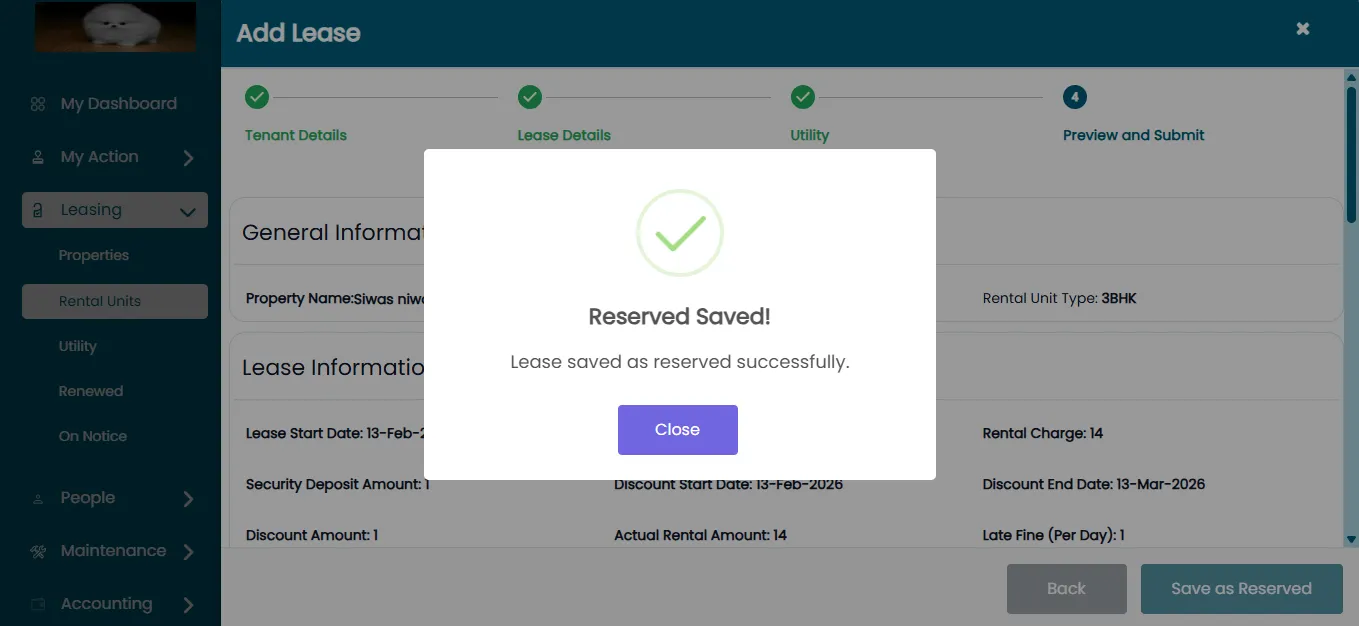
Now in the Reserved Rental Unit you can view the new tenant detail.