Notice period Report
A Notice Period Report in leasing is a system-generated report that tracks and summarizes all lease agreements where tenants have submitted notice to vacate, or where the property owner/manager has issued a notice. This report helps leasing and property management teams monitor upcoming move-outs and plan operations accordingly.
In our ERP system, the Notice Period Report can be scheduled in three formats: Daily, Weekly, or Monthly.
Business Need For Notice period Report
We need this report to see which tenants are planning to check out and when their notice period ends. With this report admins, property managers, leasing teams, finance teams, operations teams stay informed about upcoming check-outs. This report makes check-out preparation easier, avoids last-minute issues, and keeps all teams stay updated about timely decisions. Admin can check the report daily, weekly, or monthly.
How to Configure the Notice Period Report
Log in To Your Admin Account
After logging in, you will be directed to the Admin Dashboard.
Now go to the Settings section.
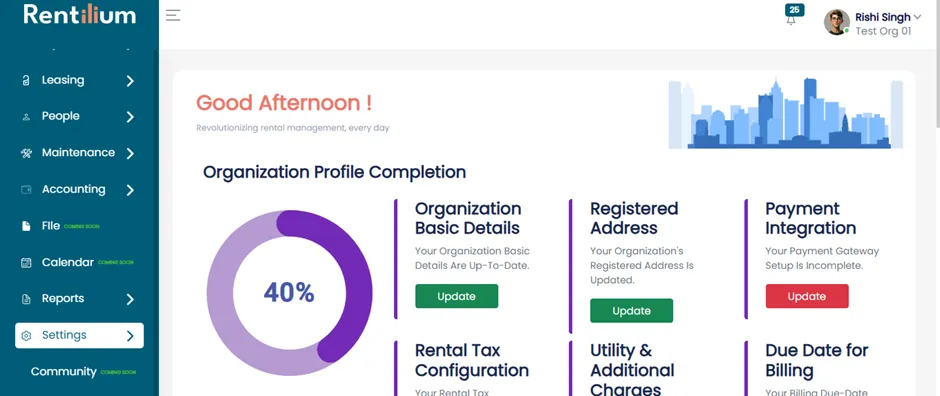
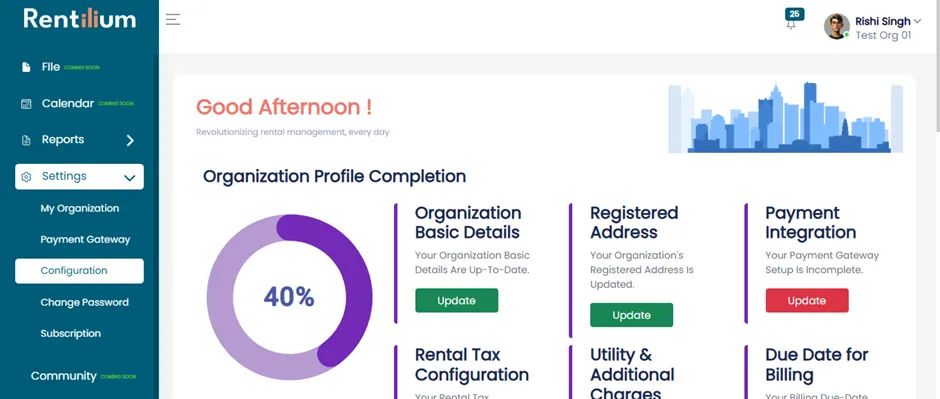
Access the Configuration Tab
Under Settings, select the Configuration tab.
Go to Notification Settings. Click on Notice Period Report.
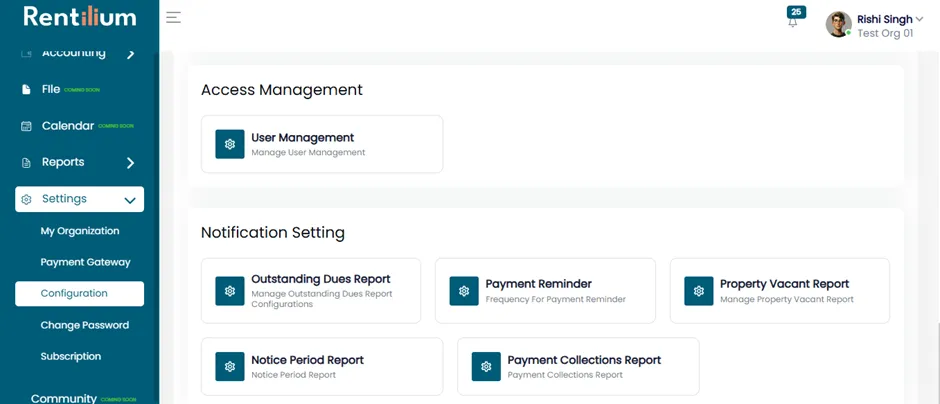
Schedule the Notice Period Report
Once you click the Notice Period Report button, the configuration page will open.
From Here admin can schedule the notice period report whether the admin want the report daily, weekly or monthly.
Click on Schedule Reports Button.
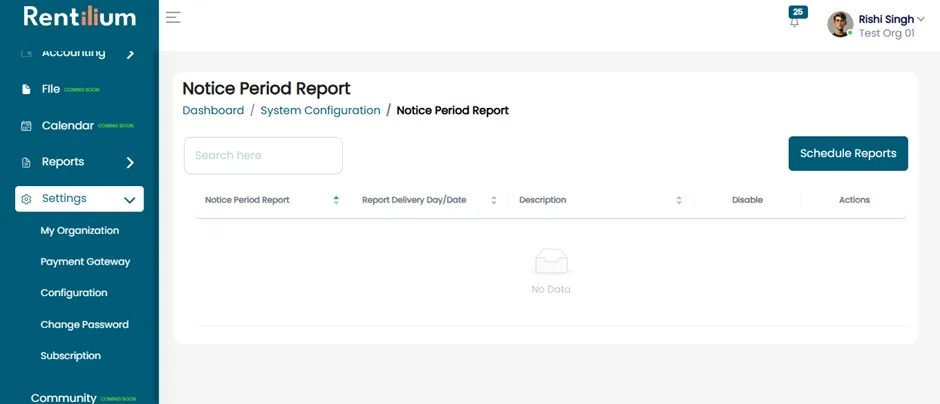
Add Notice Period Report
After clicking Schedule Reports, the Add Notice Period Report page will open.From here admin can add whether they want the report on a daily basis, weekly or monthly. This page includes the following fields:
- Notice Period
- Report Delivery Date/Day
- Description
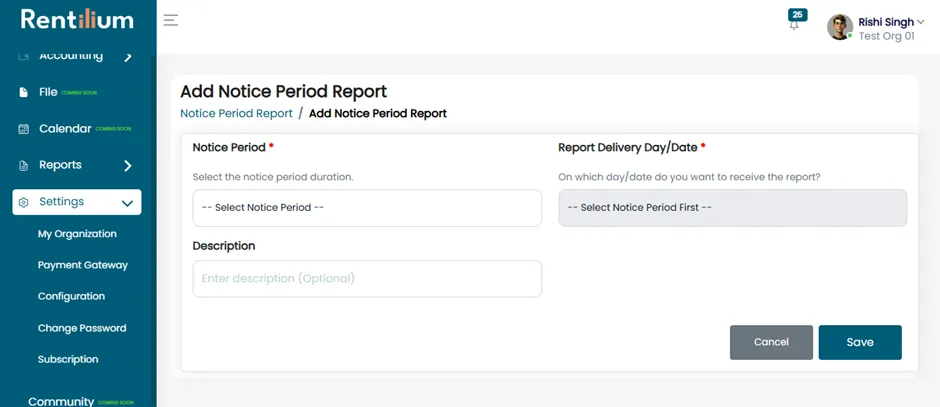
Add Notice Period Report
The available fields will change depending on the frequency selected.
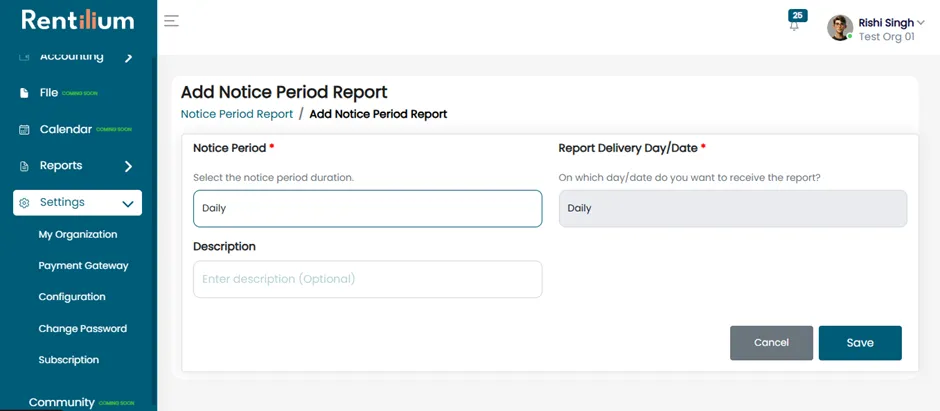
Daily Report
- If the admin selects Daily, the Report Delivery Date and Day fields will be disabled, as the report will automatically be delivered every day.
- Enter a Description and click Save.
- The daily notice period report will now be scheduled successfully.
Weekly Report
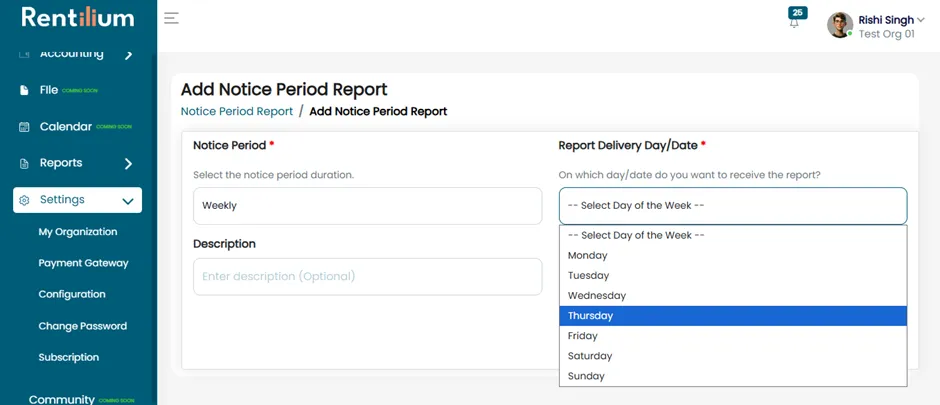
- Select Weekly. Now admin can select on which day they want that report.
- Choose the desired day for report delivery.
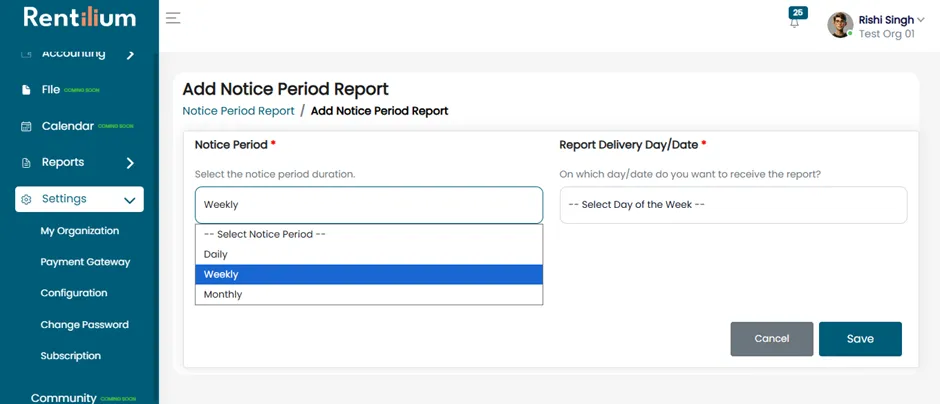
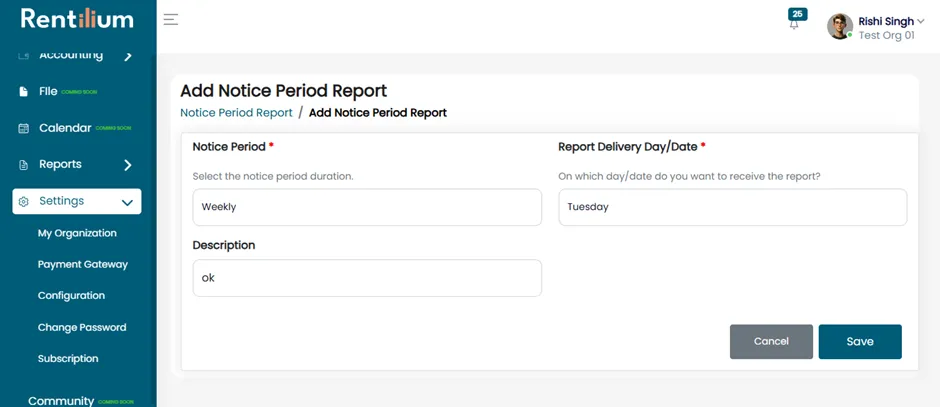
- Fill in the Description and click Save.
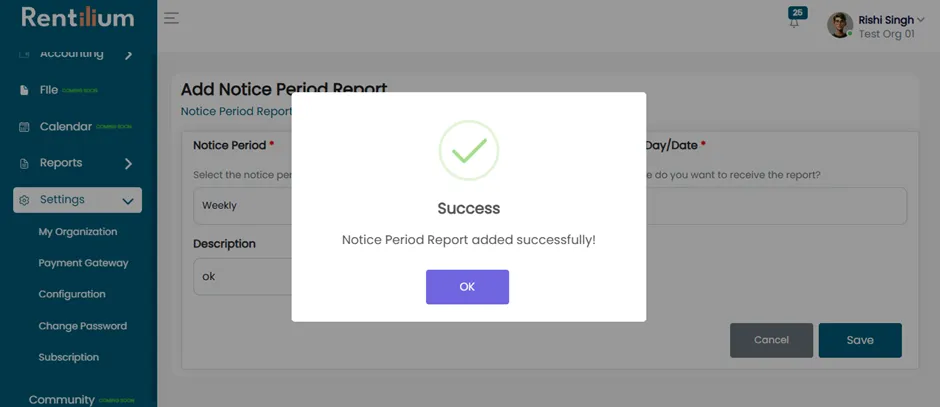
- The weekly notice period report will now be scheduled successfully.
Monthly Report
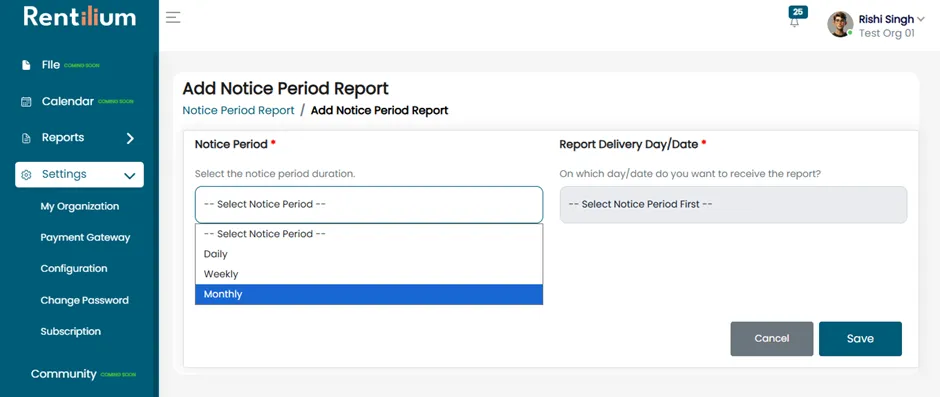
- Select Monthly. Now admin can select on which date they want that report.
- Enter the Description and click Save.
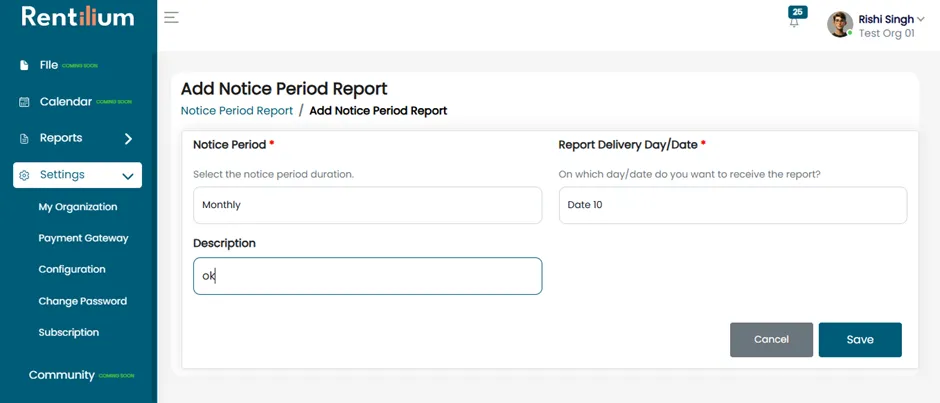
- The monthly notice period report will now be scheduled successfully.
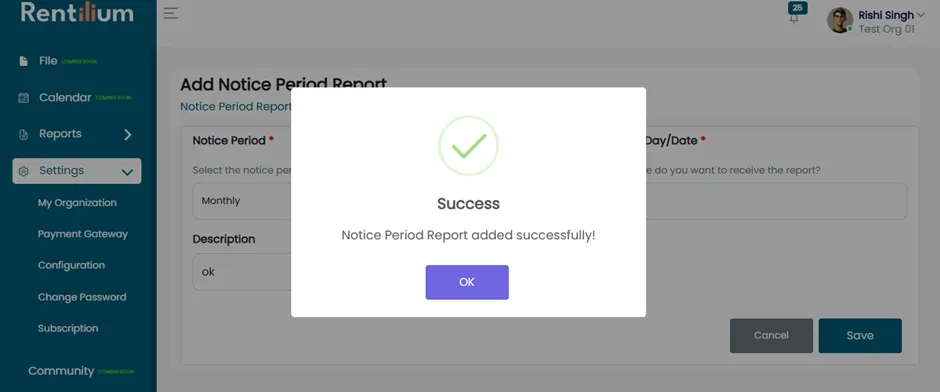
Notice Period Penalty
Enable Notice Period Policy
Go to the Settings section and open the Configure tab.
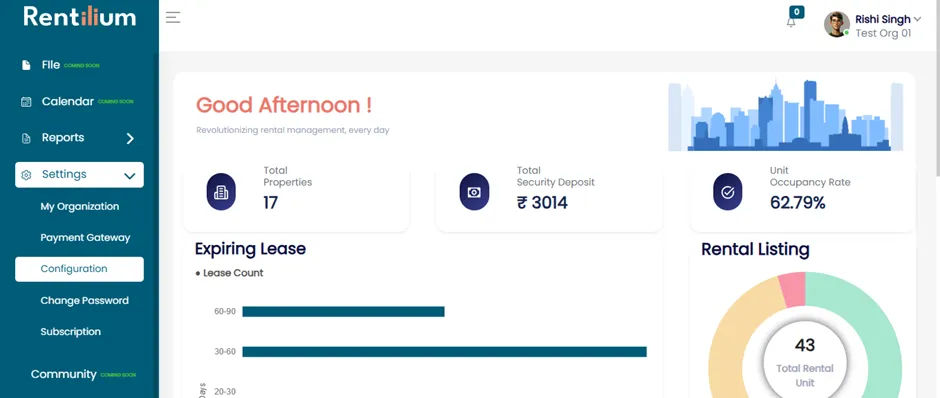
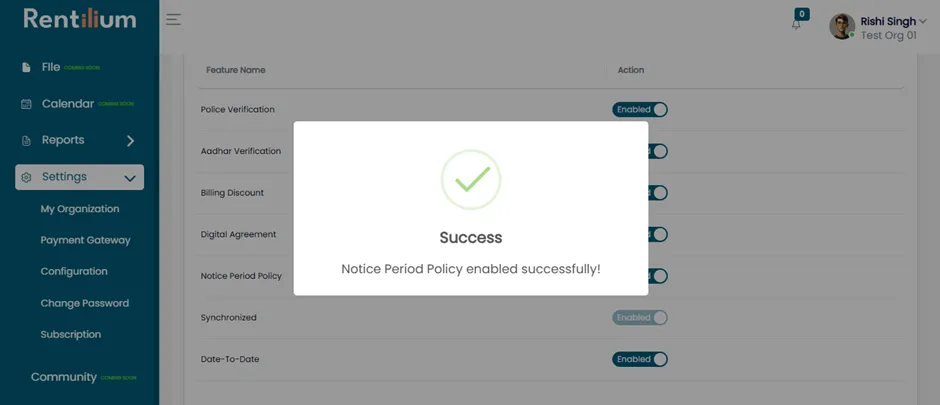
In the Feature Configs tab, enable the Notice Period Policy feature.
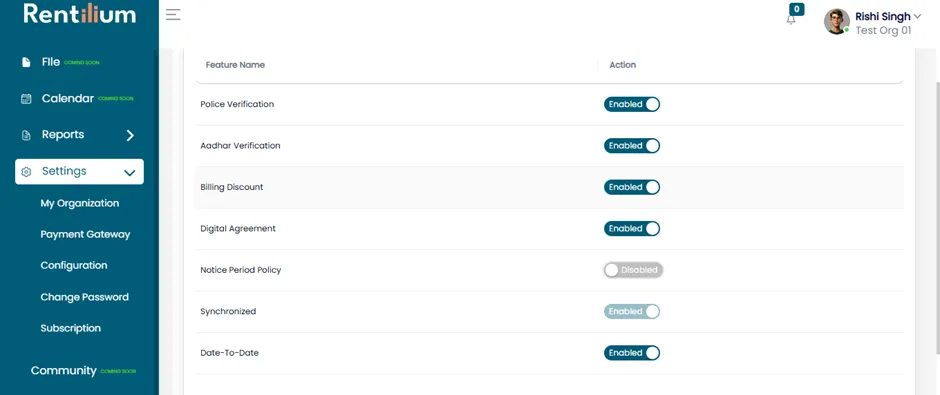
Once enabled, the notice period policy will be successfully activated.
Configure Notice Period Policy
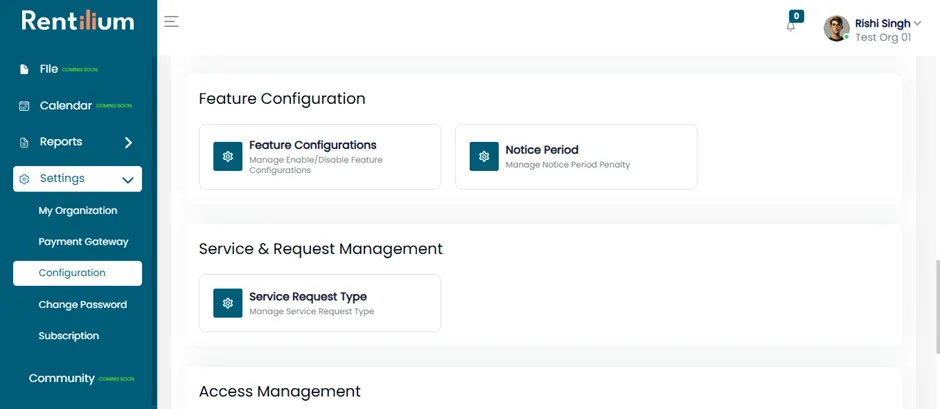
Navigate to the Notice Period Policy tab under the configuration section.
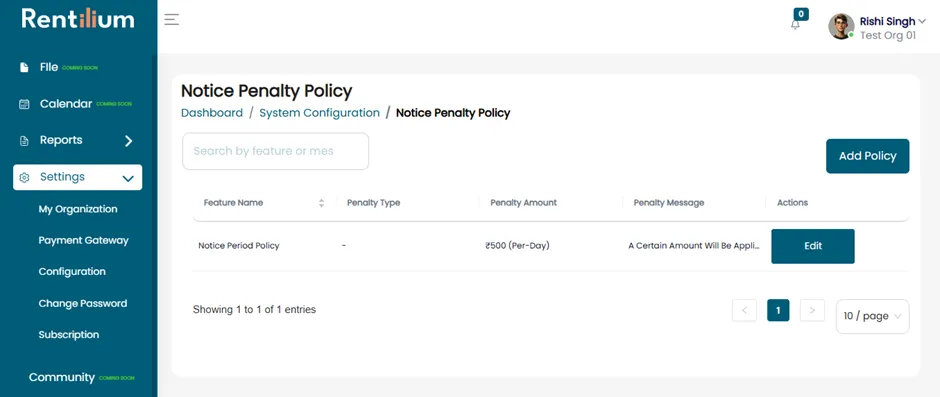
The Notice Penalty Policy page will open, where the admin can add a penalty policy.
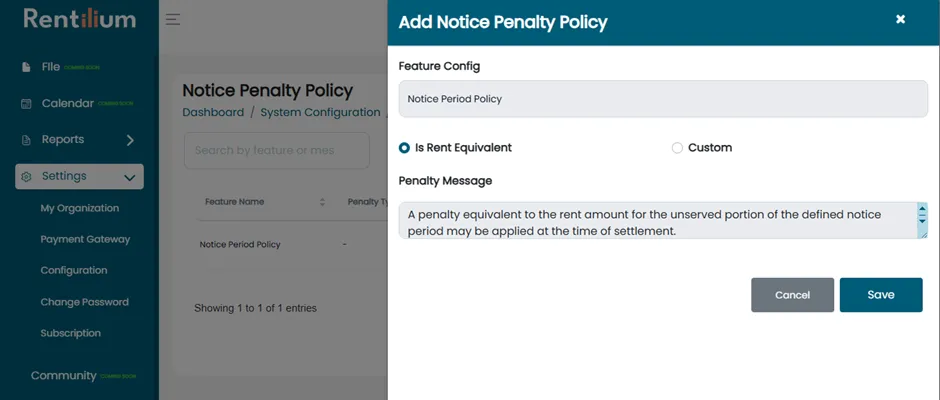
Click on Add Policy. Here the admin can choose between Rent Equivalent or Custom.
For Rent Equivalent
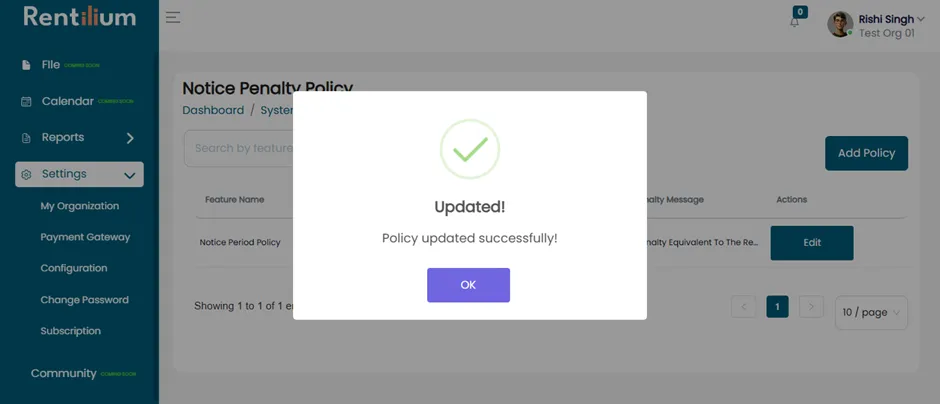
Is Rent Equivalent: The tenant must pay the full rent if they breach the notice period policy.
Select Rent Equivalent and click Save.
For Custom
Custom: The tenant must pay a custom penalty amount per day set by the admin.
Example: Penalty amount = 400 per day.
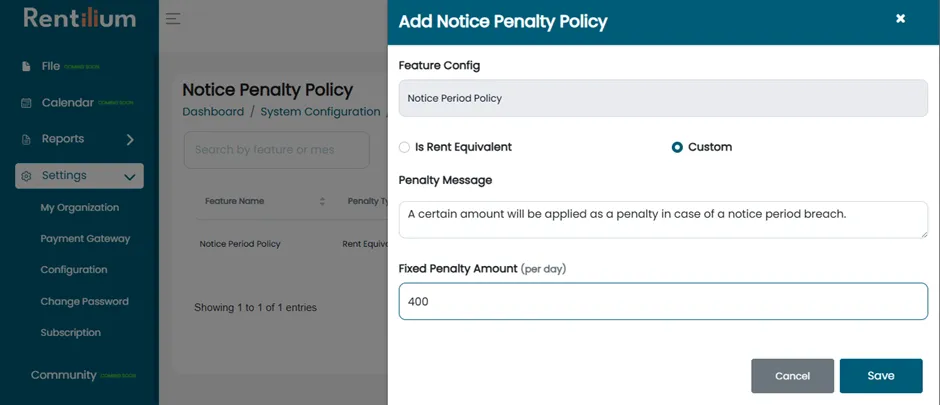
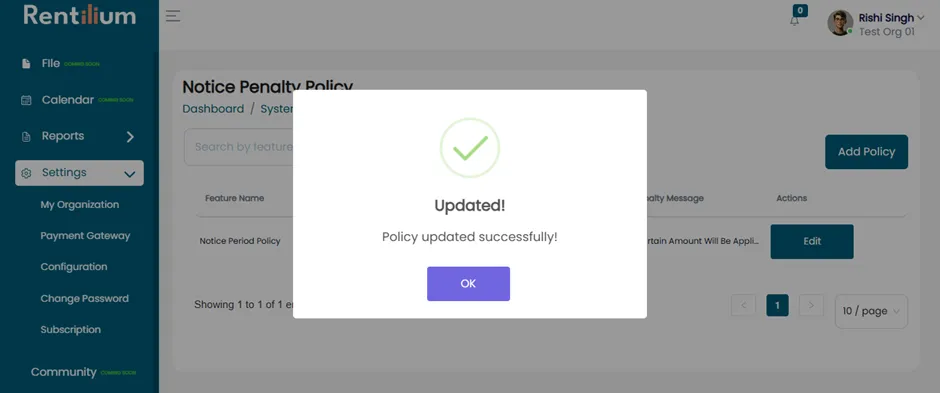
Select Custom and click Save.
Check-in Tenant
Go to the Active Lease section and choose the tenant to check in.
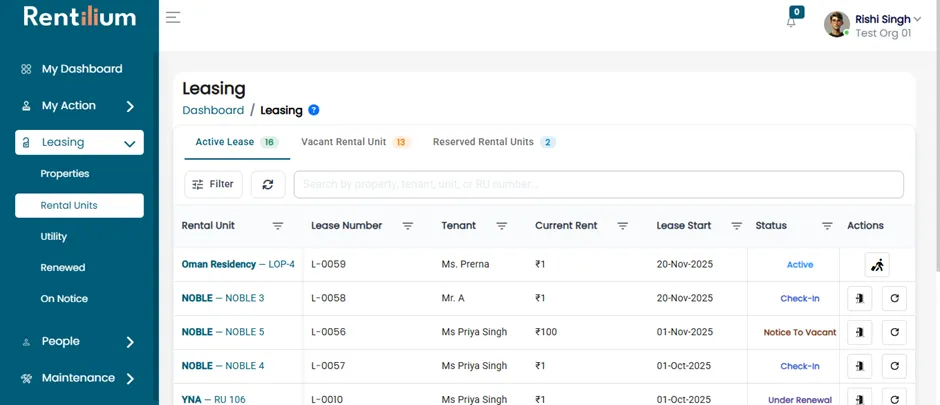
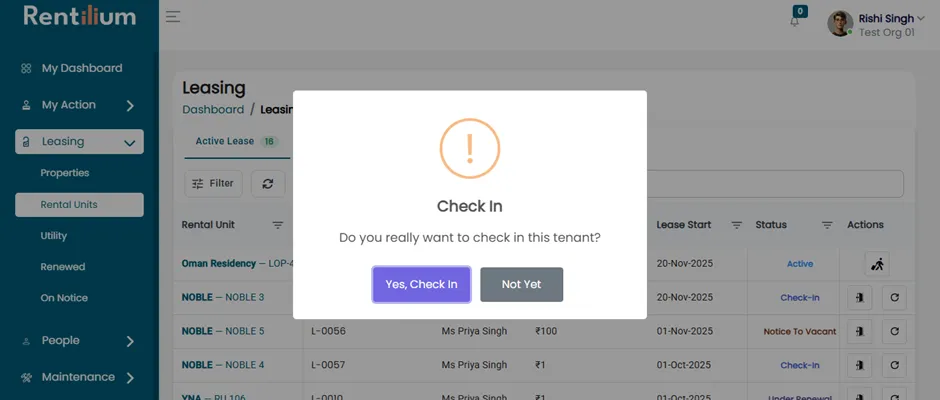
Click on Check-in. A confirmation message will appear: Do you really want to check-in this tenant? Click Yes, Check-in.
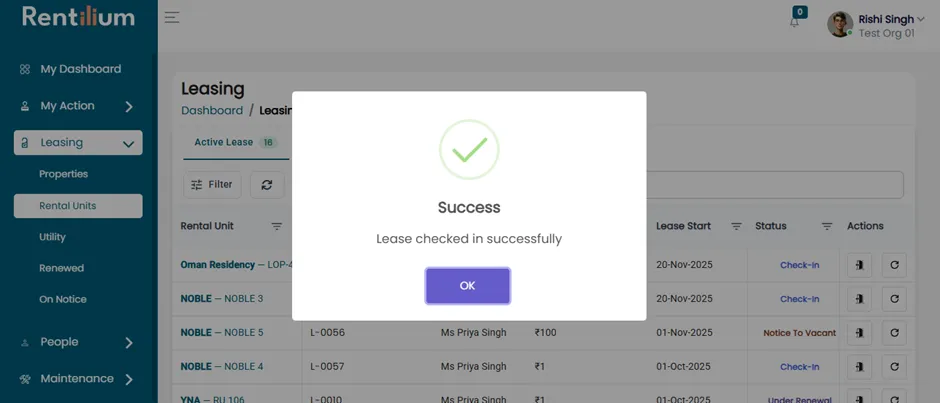
After successful check-in, a notification will appear: “Your lease checked-in successfully.”
Notice to Vacate
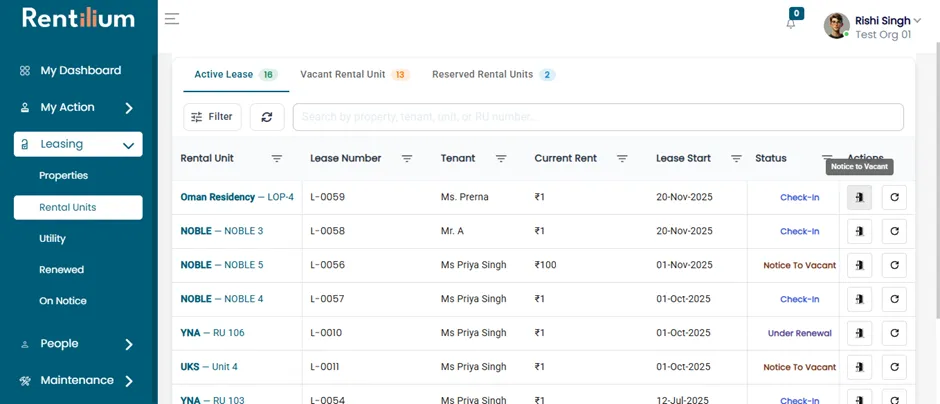
Click the Notice to Vacant button.
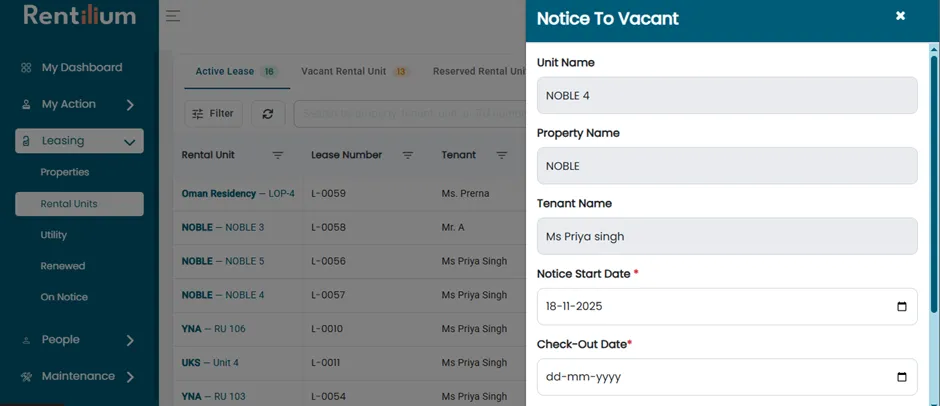
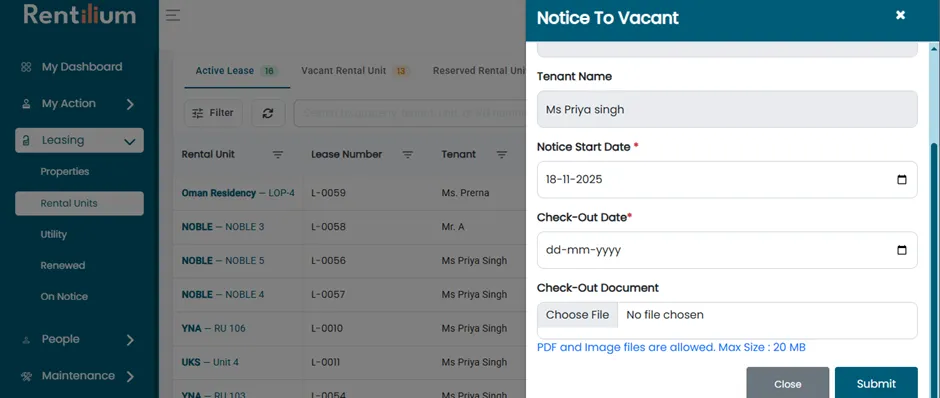
After clicking on notice to vacant button the notice to vacant page will open. Fill all the necessary details.
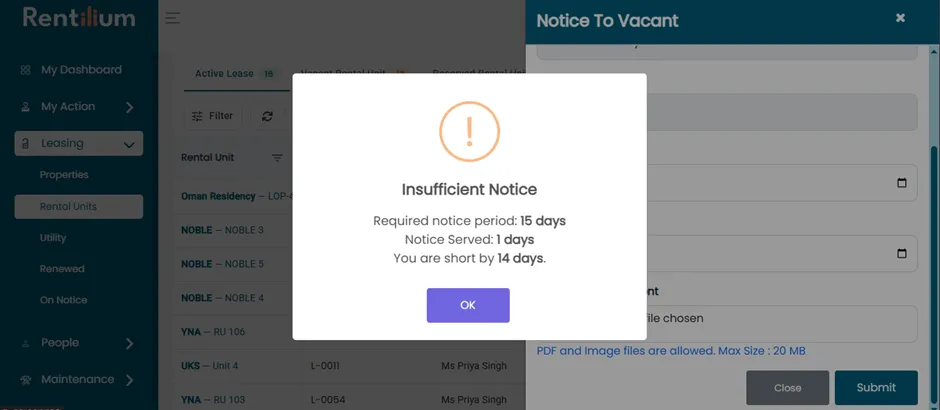
Now if tenant don’t want to serve notice period then the tenant will get a notification
Required Notice Period: 15 days, Notice Served: 1 day and sort by: 14 days
Now click on ok button and proceed.
Now click on submit button.
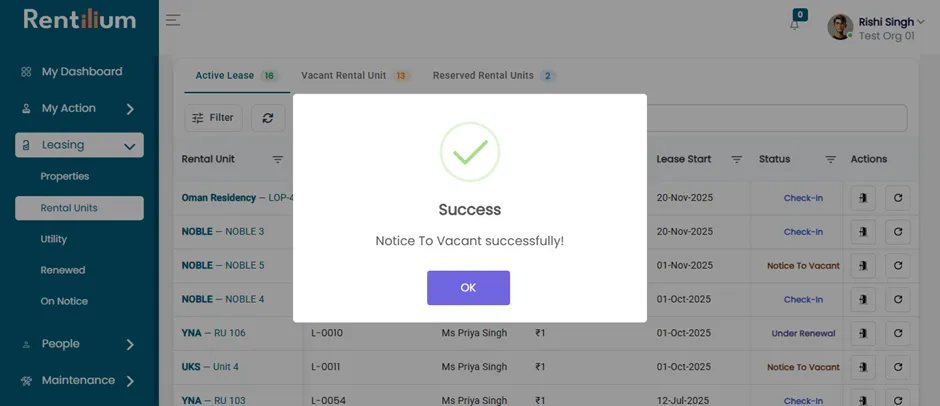
A notification will appear: “Notice to Vacant Successfully.”
Check-out Process
Go to the On-Notice section to complete the check-out.
Use the search bar to find the tenant (e.g., Priya Singh).
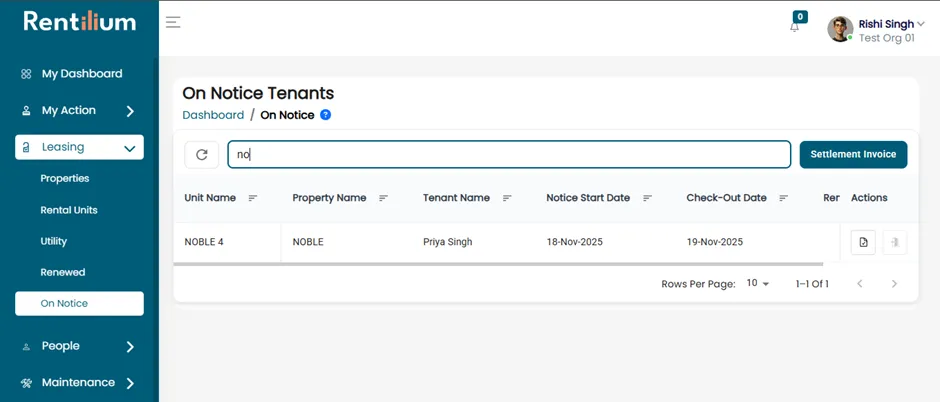
Click Generate Settlement to generate all pending invoices.
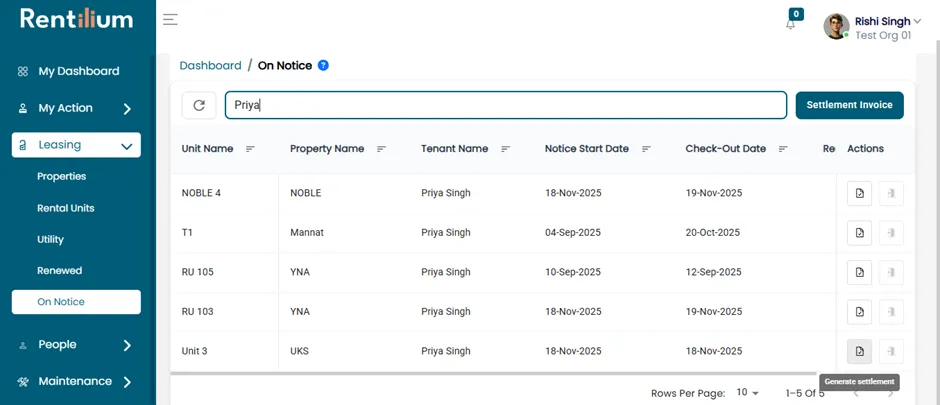
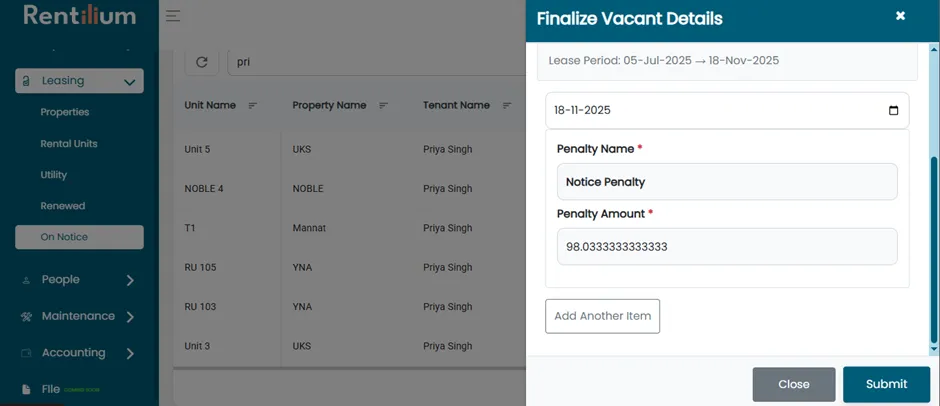
After Clicking on generate invoice finalize vacant detail page will open.
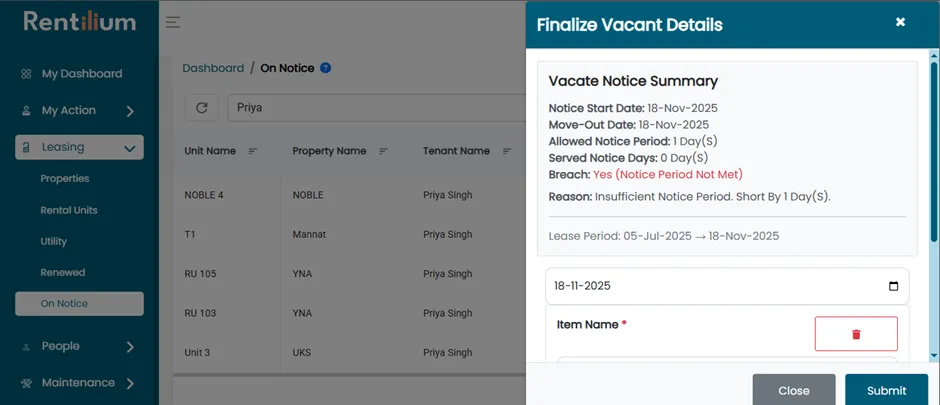
Finalize Vacant Details
Add the Penalty Name and Penalty Amount.
Add any Damage Item details and the corresponding amounts, if applicable.
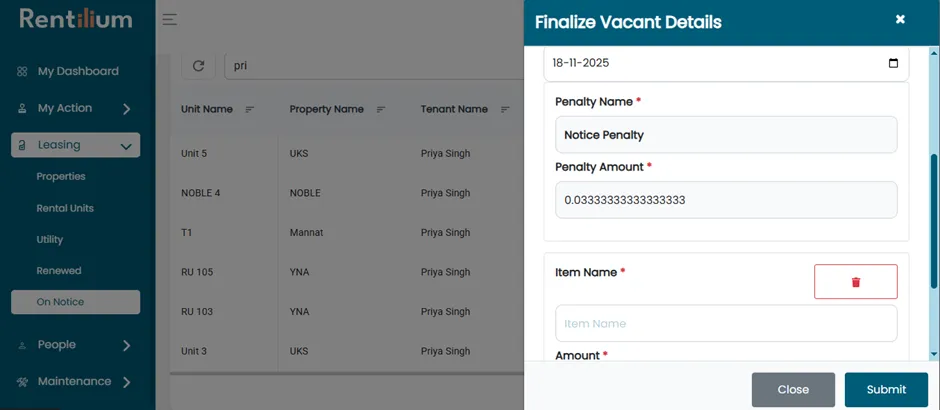
After Filling All the required details click on submit button. You will receive a notification to generate all pending invoices.
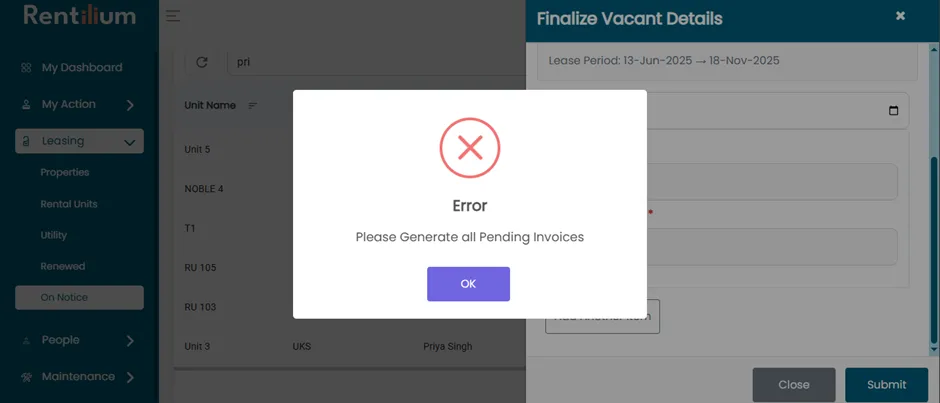
Generate Pending Invoices
Go to the Accounting section and open the Invoice tab.
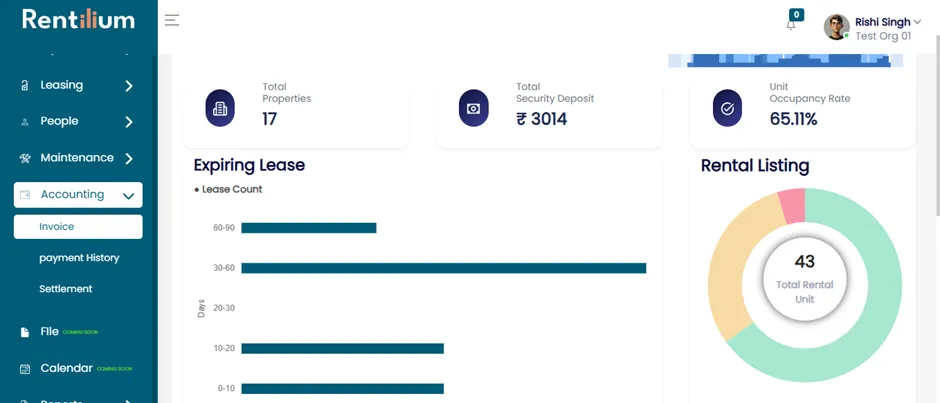
Generate all pending invoices by clicking the Action button.
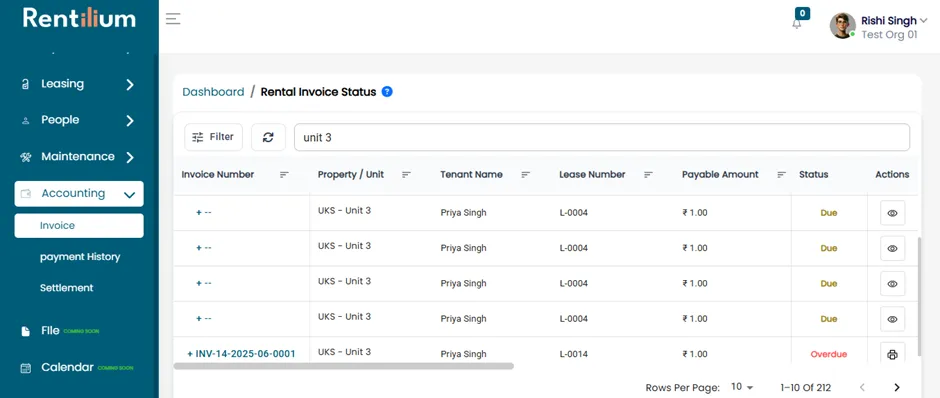
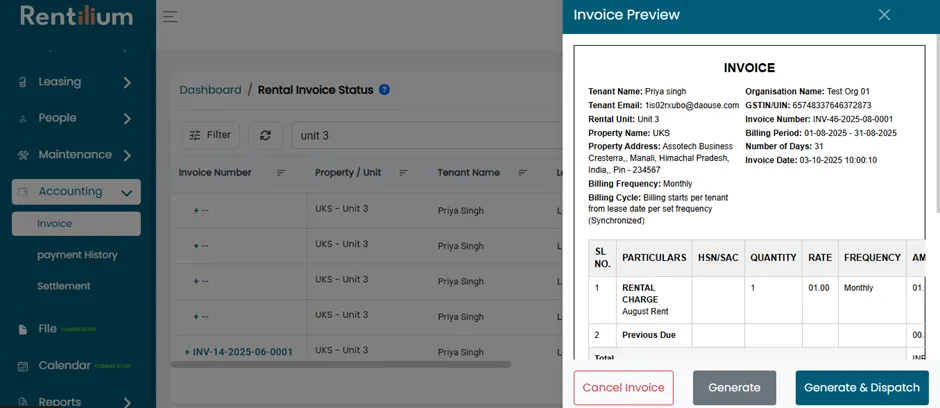
After clicking on action button, the invoice page will open. Now click on generate button.
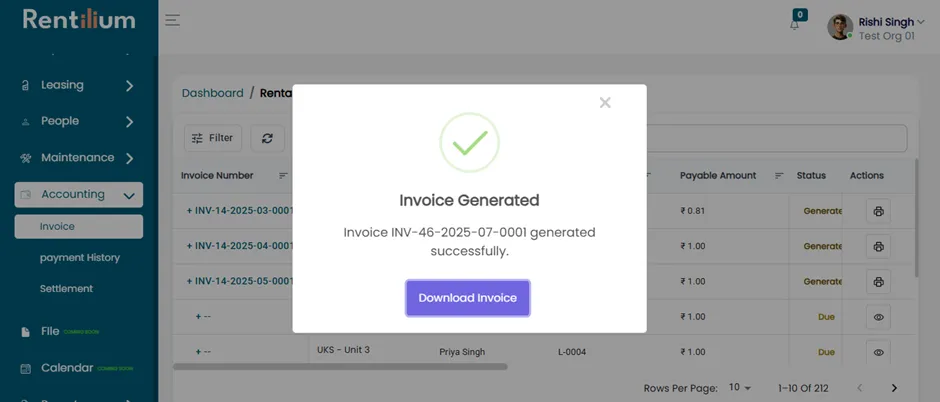
After clicking on generate button the invoice will be successfully generated.
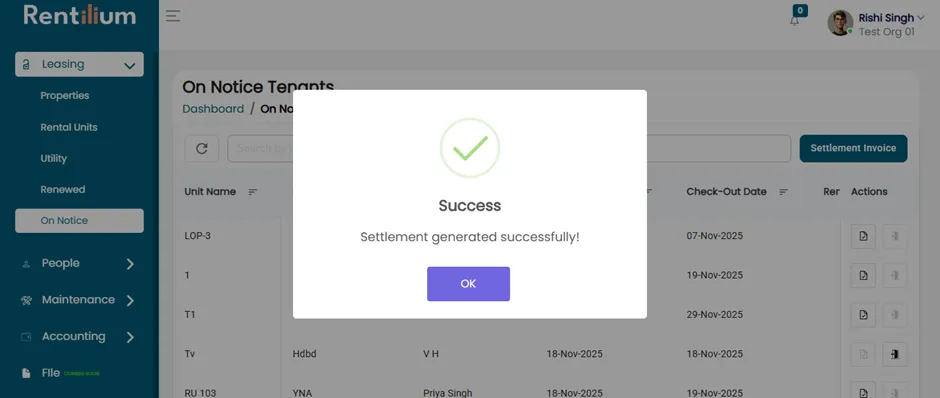
After generating all invoices, return to the Finalize Vacant page.
A success popup will confirm that all invoices have been generated.
Complete Check-out
Once all invoices are generated, the Property Vacant and Check-out button will become enabled. Click on Check-out.

You will receive a confirmation message: “Are you sure you want to vacant this property and complete check-out?” Click Yes, Vacant.
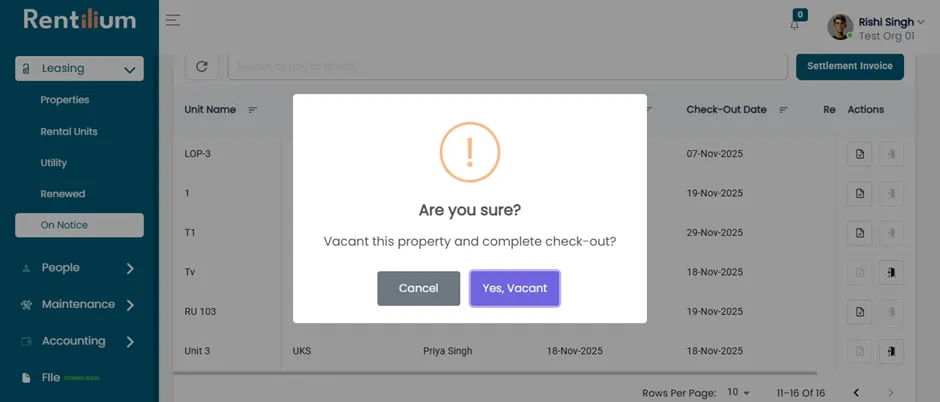
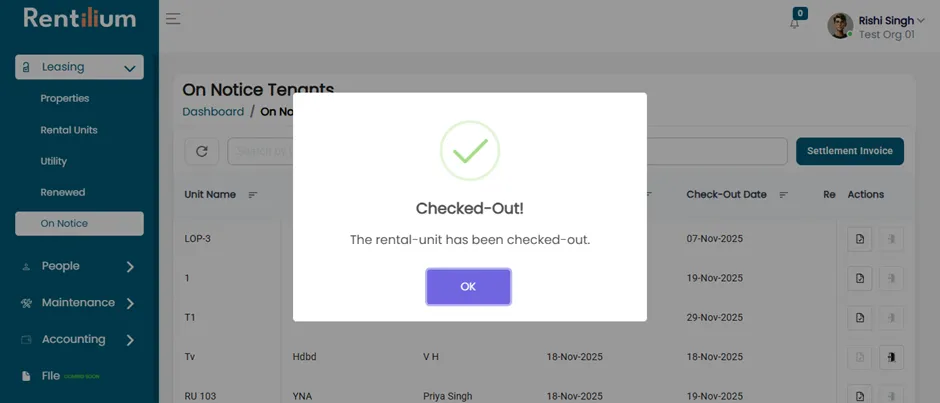
After clicking on Yes, the rental unit will now be successfully checked out.