Profile Photo Upload & Blood Group
6 min
This document provides a step-by-step explanation on how admins and tenants can upload their profile photo and select the blood group for a tenant within the ERP. These updates help maintain complete and accurate tenant records in the system.
Move To The Tenants Listing Page
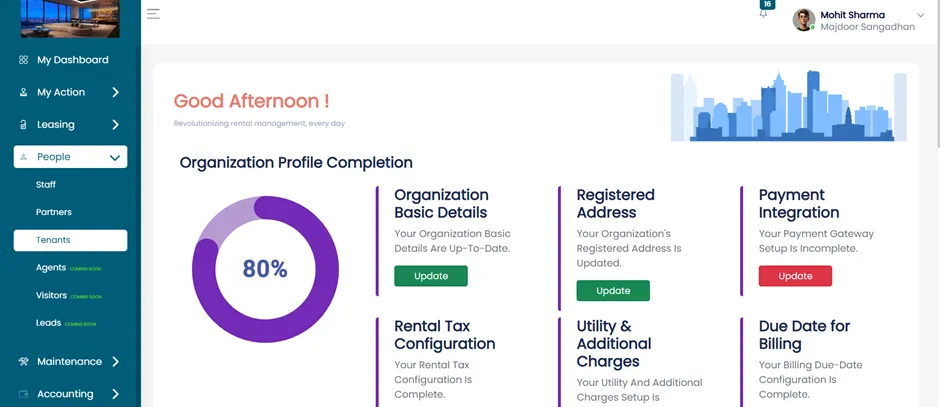
- From the Dashboard, go to the People section.
- Move to People > Tenants to access the Tenants Listing Page.
Tenant Detail Page
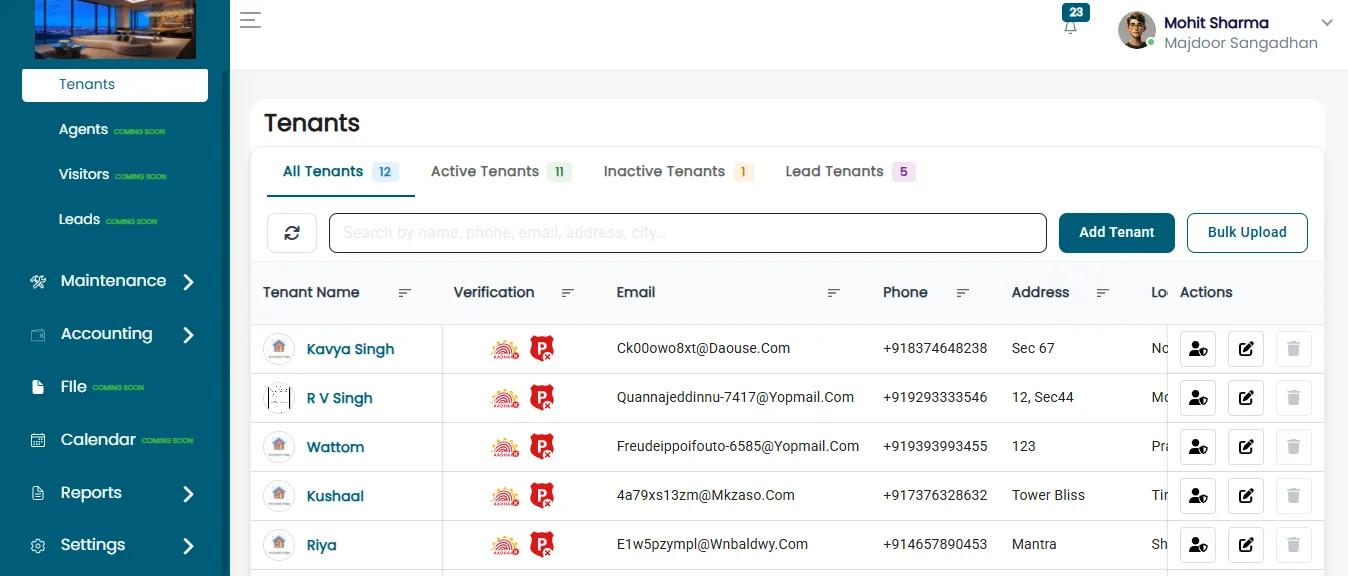
- After clicking on the tenant option, the tenant detail page will open.
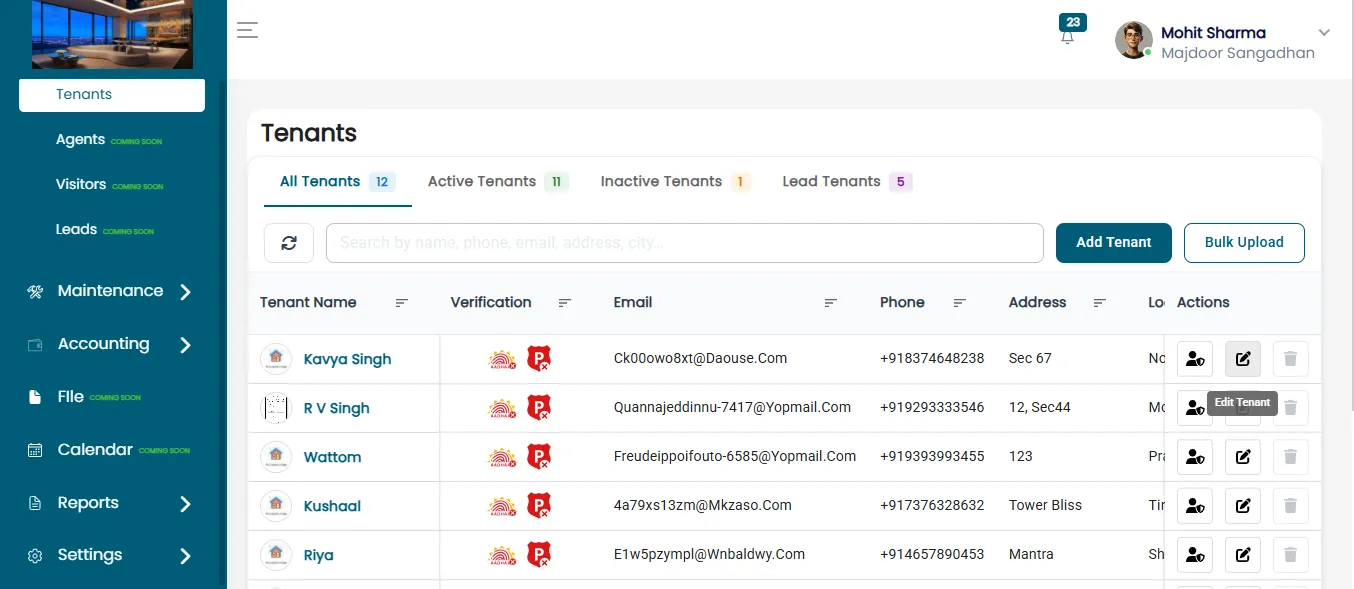
In the Action column, you will see two icons/buttons:
- Edit
- Delete
Click the Edit icon.
Update Tenant Information
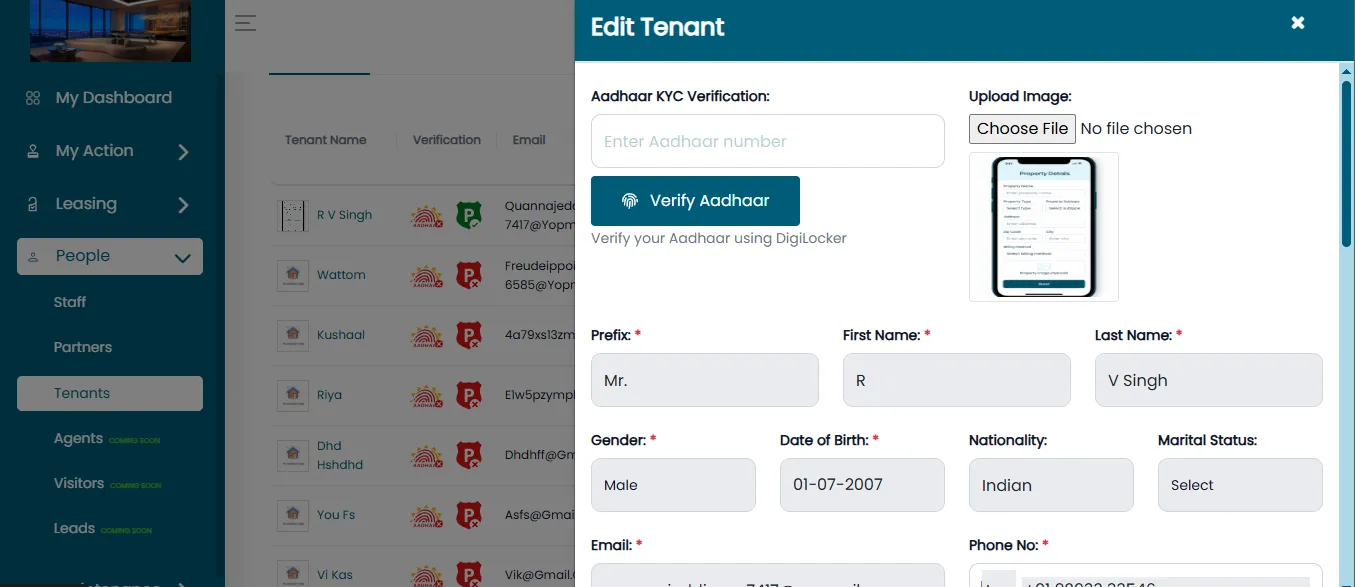
After clicking the Edit button, you will be directed to the Tenant Edit Page. On the Tenant Edit Page, you will see the following details:
- Prefix
- First Name
- Last Name
- Comments
- Aadhar Number
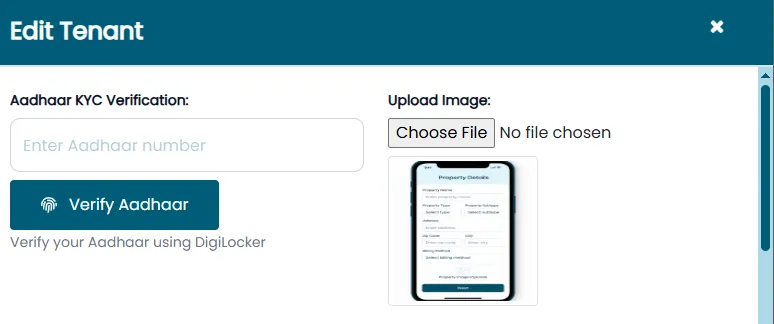
- Upload Image
- Father’s Name
- Mother’s Name
- Spouse Name
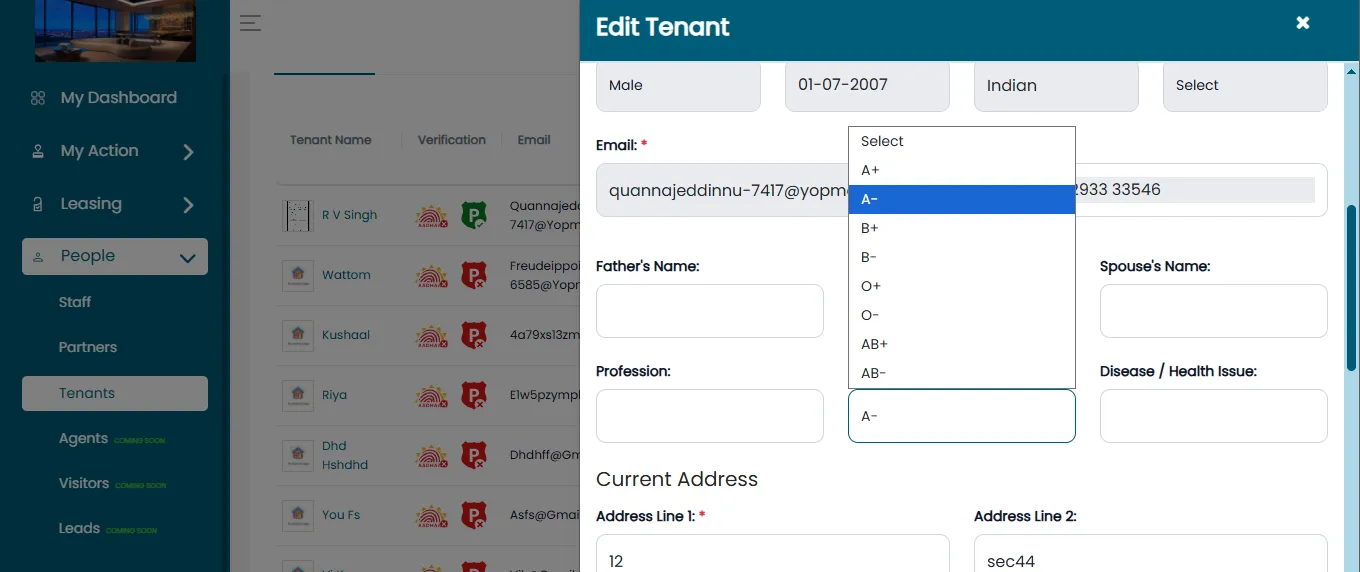
- Blood Group
- Profession
- Address Line 1
- Address Line 2
- Locality
- Zip Code
Upload Tenant Profile Photo
- On the edit page, click the Upload or Choose File button to select and upload the tenant’s profile photo.
Select Tenant Blood Group
- Scroll down further on the Tenant Edit Page to locate the Blood Group dropdown field.
- Click the dropdown and select the tenant’s blood group (e.g., A+, B-, O+, AB+, etc.).
Save Updates
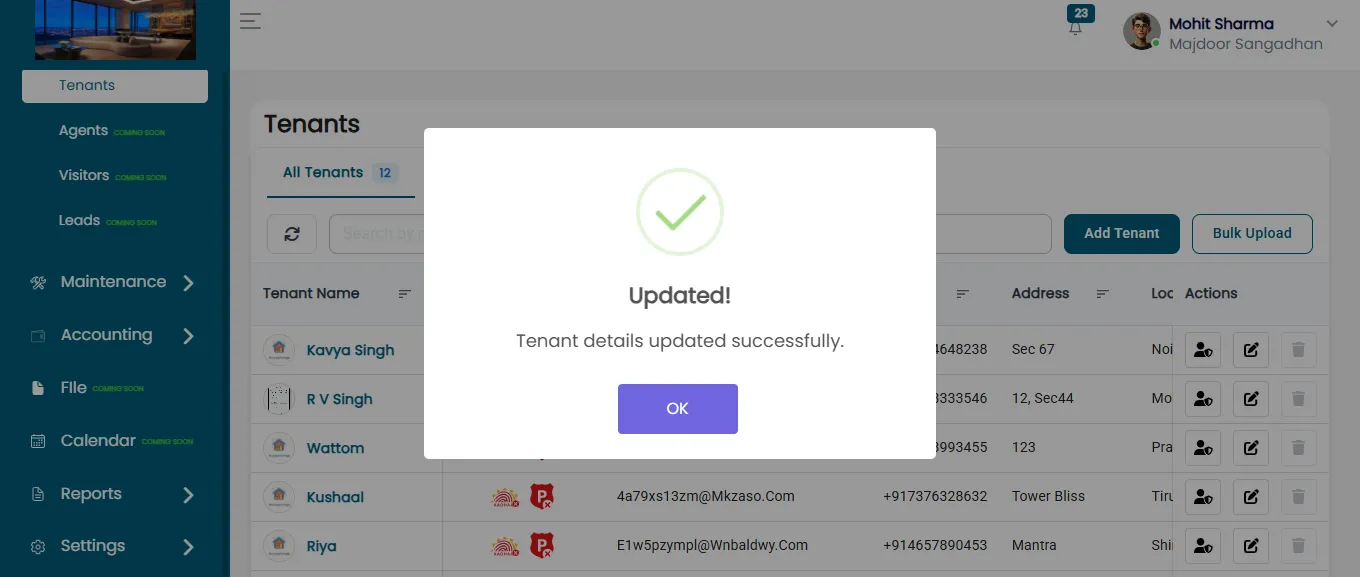
- After updating all the required fields—including the photo upload and blood group. Click the “Update” button.
- After clicking on the update option, the tenant's details will be updated successfully.
By following this process, you can easily update a tenant's profile photo and blood group. This ensures accurate and complete tenant records within the ERP system.