Tenant Delete/Edit
This document gives a procedure for removing or deleting a tenant from the ERP. Removing/Deleting a tenant is a very crucial task that should be performed carefully. It explains further on how one should access the system, get to the right section, and permanently remove a record for tenancy.
Tenant Delete Process
The following is the process for deleting the tenant from the ERP:
People Section
- Click on people section for tenant delete procedure.
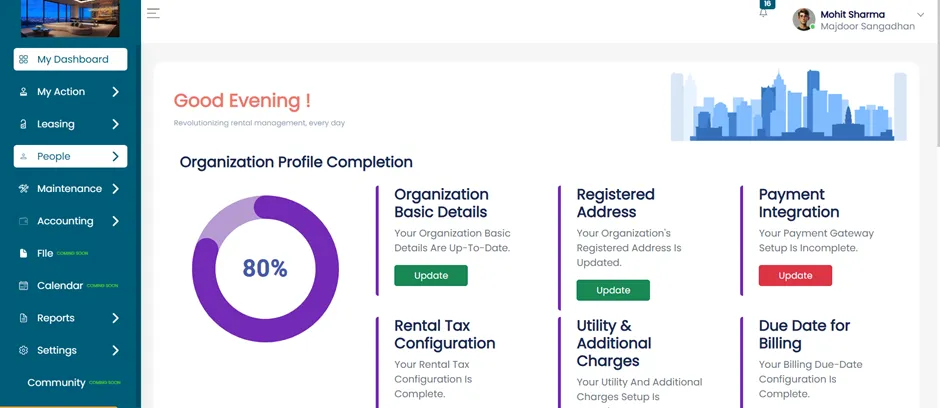
- A dropdown or subsection will appear. Click on the "Tenant" option from this list.
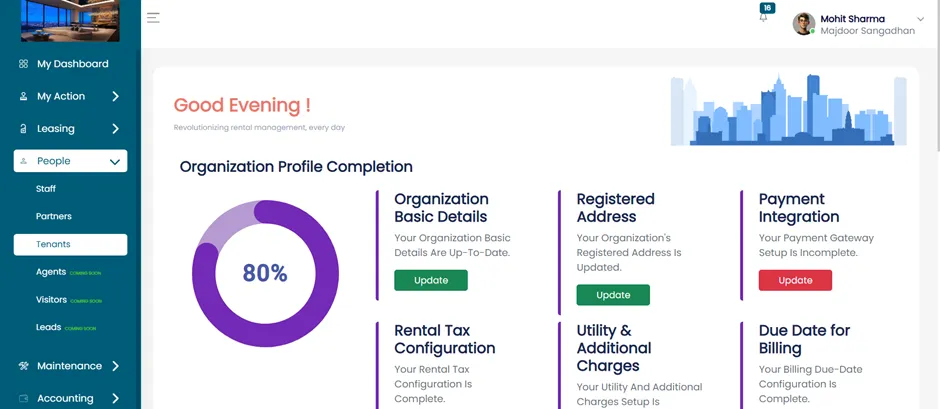
Tenant Detail Page
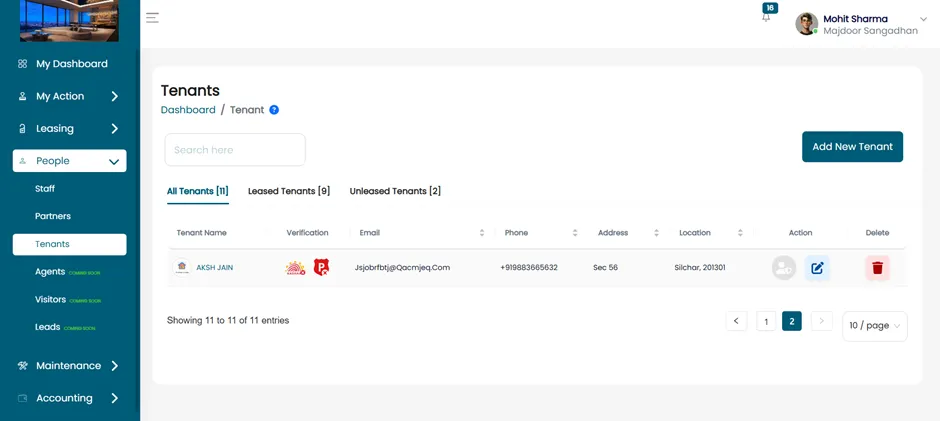
After clicking on the tenant option, the tenant detail page will open.
In the Action column, you will see two icons/buttons:
- Edit
- Delete
Now, if you want to delete the tenant, then click on the delete button.
Confirm Deletion
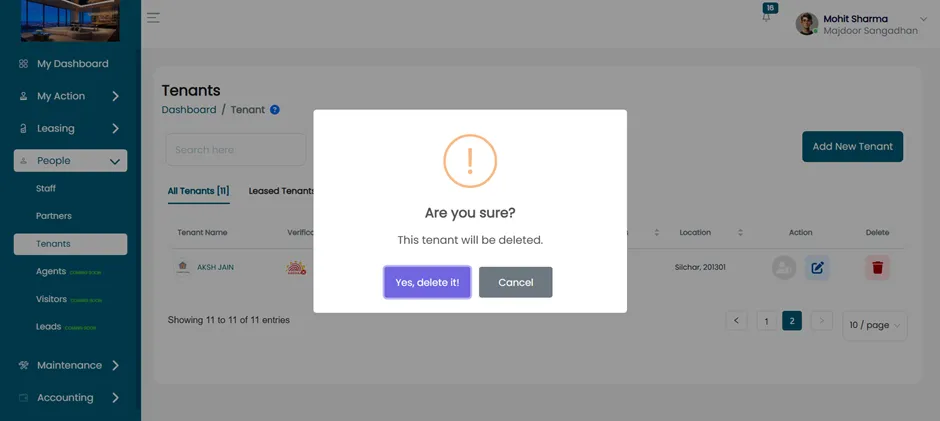
- A popup will appear with a message like, are you sure you want to delete this tenant?
- Click on "Yes, Delete It".
Completion
- After clicking on yes, the tenant will be successfully deleted from the ERP system.
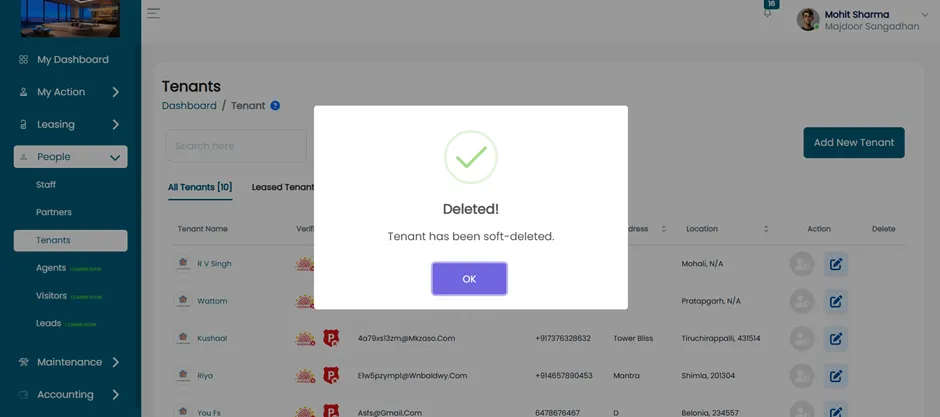
Deleting a tenant from the system is a simple process. By following the given steps in this document, you can delete a tenant from the system.
Tenant Editing Process
This document explains the steps to edit a tenant's information in the ERP system. Editing tenant details is important for maintaining accurate data.
Move To The People Section
- Now, click on the people section for the tenant edit procedure.
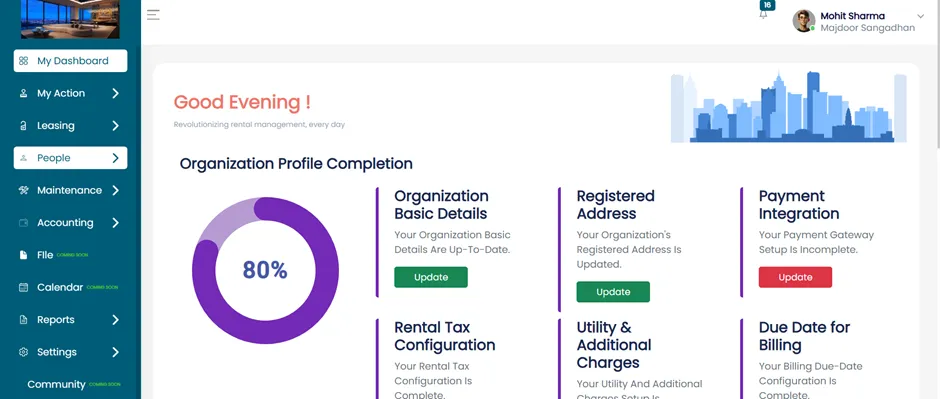
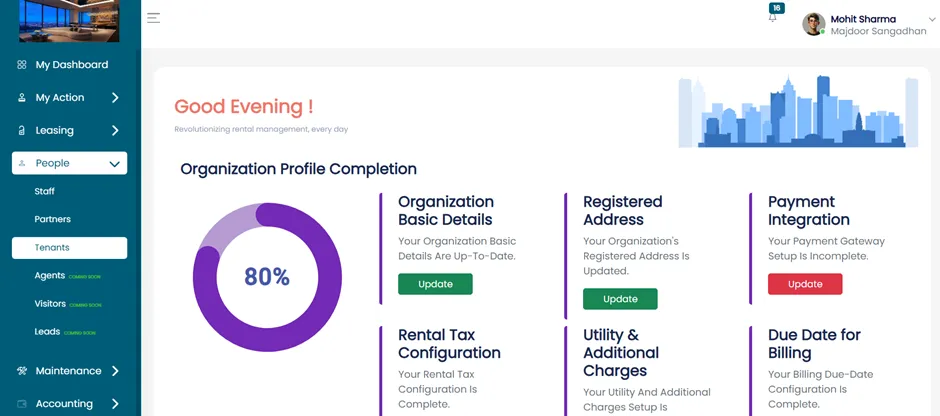
- After clicking on people, click on the tenant option, which is in the sub-section on people
Access Tenant Detail Page
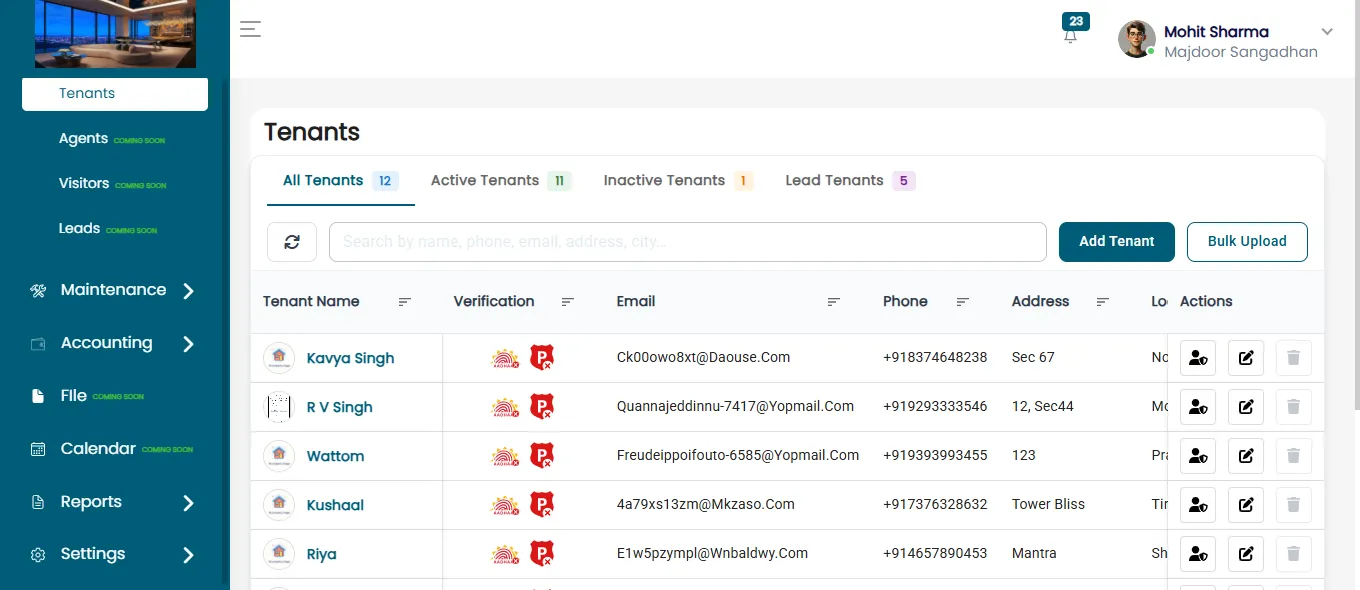
After clicking on the tenant option, the tenant detail page will open. You will see two icons in the Action column.
- Edit
- Delete
In the Action column, click on the Edit icon next to that tenant’s name.
Update Tenant Information
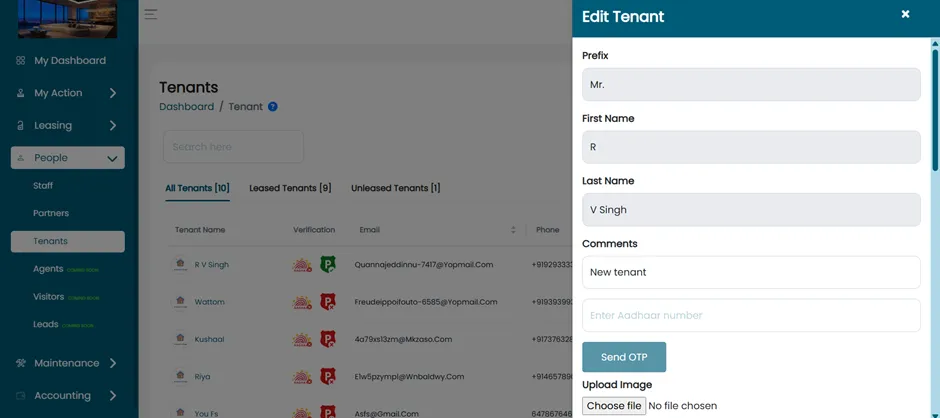
After clicking on edit button, tenant edit page will open.
On the Tenant Edit Page, you will be able to update the following details:
- Prefix
- First Name
- Last Name
- Comments
- Aadhar Number
- Upload Image
- Father’s Name
- Mother’s Name
- Spouse Name
- Blood Group
- Profession
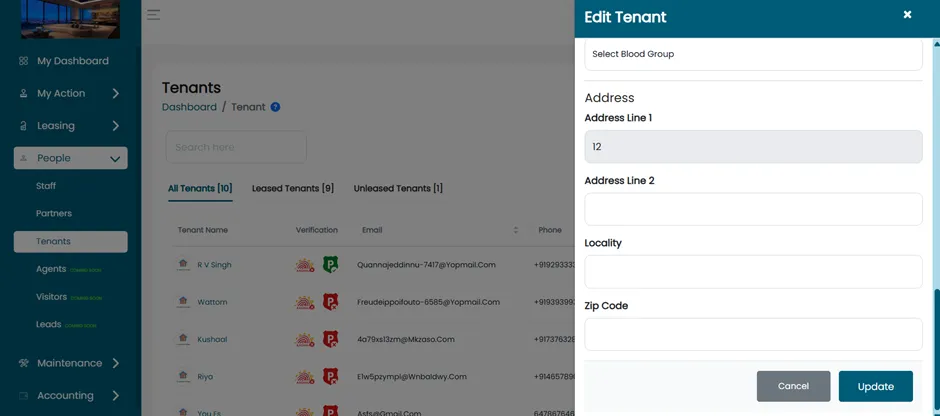
- Address Line 1
- Address Line 2
- Locality
- Zip Code
Save Changes
- Once all the required details are updated, click on the “Update” button.
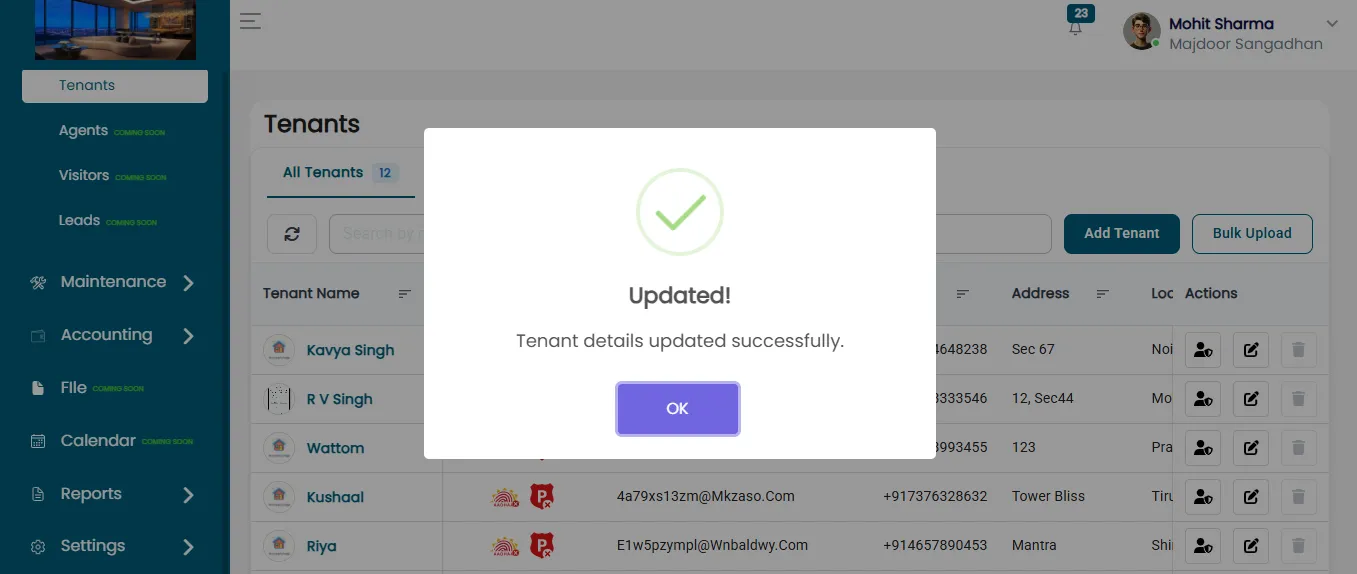
- After clicking the Update button, the tenant details will be successfully updated in the system.
By following the given steps, you can easily edit and update tenant details in the ERP.